【How to make a world: More techniques vol.3】Lighting - Light settings and bake

In the installation and first steps course, we've created a simple world and made it public. In the More Techniques course, we will explain how to enrich your world, such as lighting and gimmicks!
In this and the previous chapter, we'll cover "emission" and "lighting," which can dramatically change the look and feel of the world!
❶ Types of lighting
There are two types of lighting methods that can be used in the world:
[Realtime Light] and [Light Bake].
We will briefly explain each method.

[Real-time light (DirectionalLight)]
A sun-like light that illuminates the entire world.
In VketCloudSDK, you can specify "DirectionalLight" from WorldSetting.
[Light baking]
Aside from [ DirectionalLight ], which illuminates the entire world by calculating the light and shadow in real time, the process of "baking" is performed to calculate the effect of light sources beforehand. By recording the effect of lights as textures, players will see the world with full effect of light sources. This technique is necessary because lighting takes lots of computing resources and it is difficult to process many light sources in real time. The effects of light sources are "baked" into the textures called Lightmaps.
Use these two types of lighting effects to improve the quality of your world!
❷ Directional Light settings
Now, let's set up a light like the sun that shines across the world.
①WorldSetting
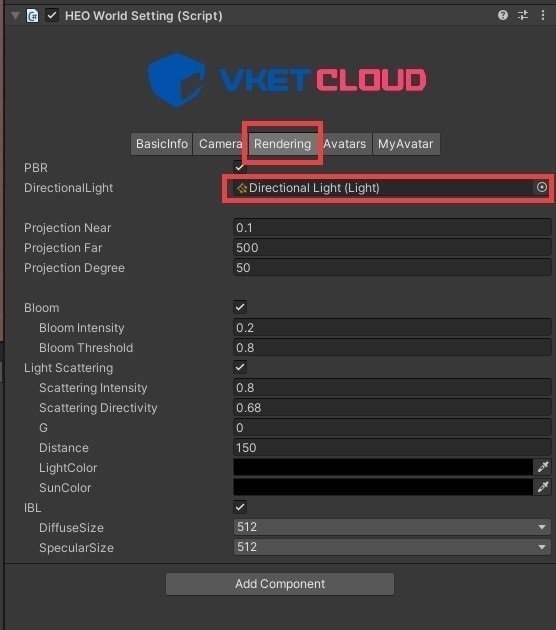
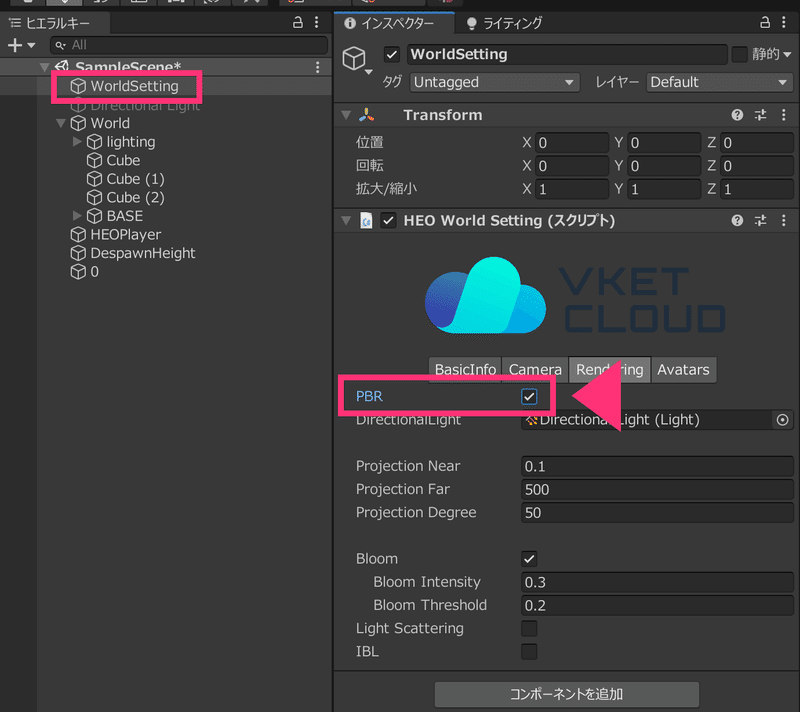
Open hierarchy>WorldSetting>inspector. Check if the "DirectionalLight" column of "Rendering" is set to Directional Light (Light) .
If not, click the ◎ on the right and select it.
(2) Settings of Directional Light
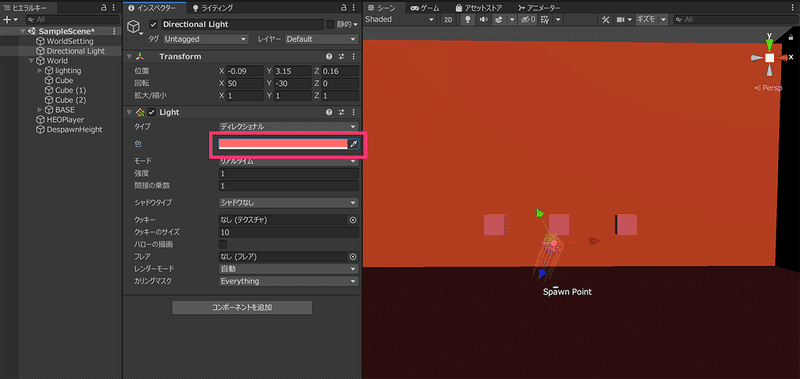
Select "DirectionalLight" in the hierarchy and check the inspector. There are several settings to be made.
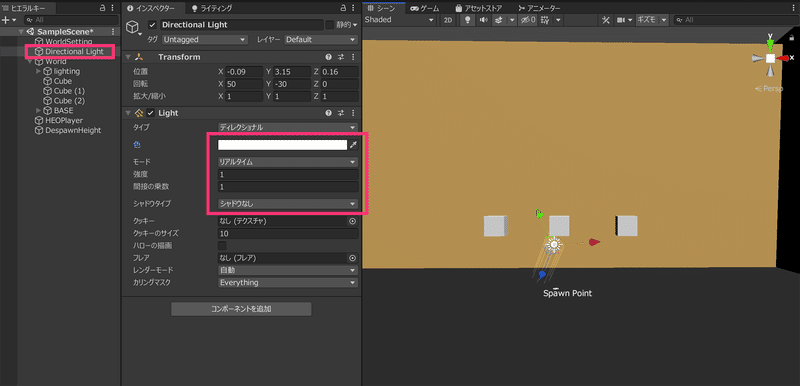
Color : Light color (set to your preferred color)
Mode : Choose Realtime
Intensity : Light intensity (set to your preferred intensity)
Indirect multiplier : Leave it as is
Shadow type : Shadow type (set to no shadow for this one)
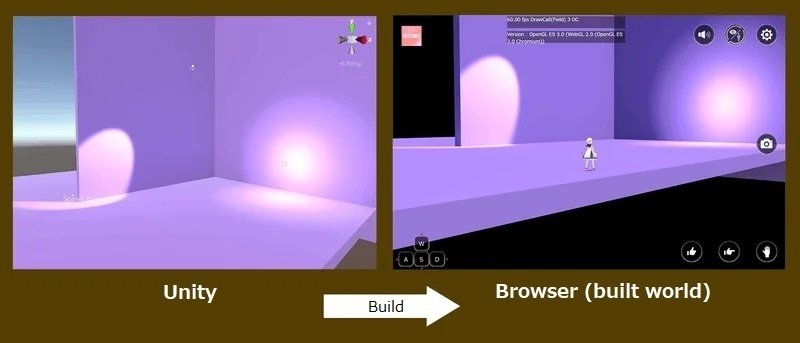
If you change the color or values of the setting, the appearance on the scene on the right will also change.
Roughly the same appearance will be seen when you build the world.
There is a sun mark on the scene that serves as a light source, but the location of it doesn't matter, so you can move it to any place that doesn't get in the way.
③ Build and check
Now let's build the world!
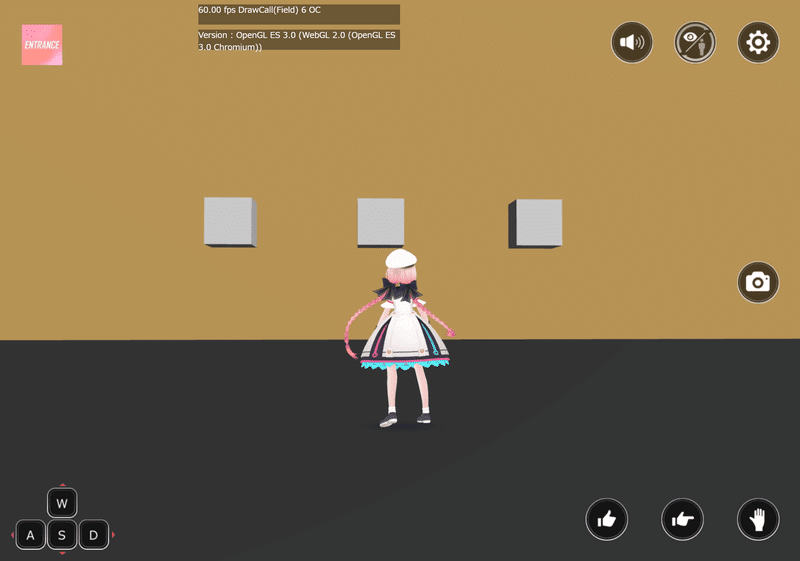
Here, our DirectionalLight led to this uniformly bright world. 💡
Let's go back to the unity screen and change the color to red.
When built in this state, the color is now red.
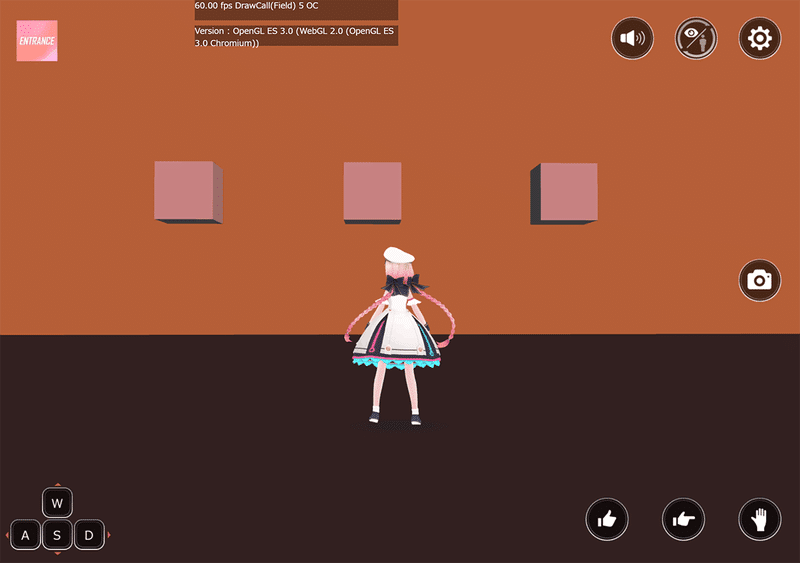
While there may be some discrepancy in the color, the entire world is dyed red!
Also, it is reflected universally as if the light is hitting all objects.
Try different values and settings!
This Directional Light alone is enough, but if you use light sources such as a spotlight, it will look very nice. We move on to the explanation of light baking.
❸ Light bake
Now let's move on to the light bake.
For the sake of explanation, please temporarily turn off the "DirectionalLight".
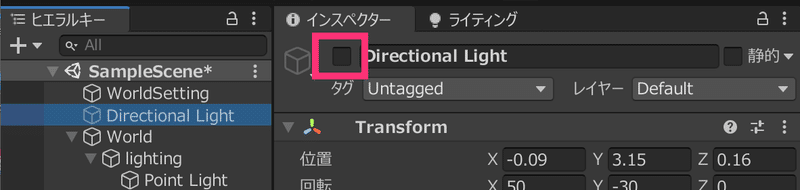
Uncheck the checkbox of "Directional Light" in the inspector. The scene will become considerably darker.
Also, be sure to check PBR in the WorldSetting Rendering!
For the lights to work the PBR must be enabled, or the world will be rendered dark💦
① Place light source
Place light source with right click > light > point light or spot light. The light source must be a children of "World" in the hierarchy .
*If you are going to have multiple light sources, it is recommendable to create an empty gameobject and place all light source objects inside it to make a hierarchical structure for better readability.

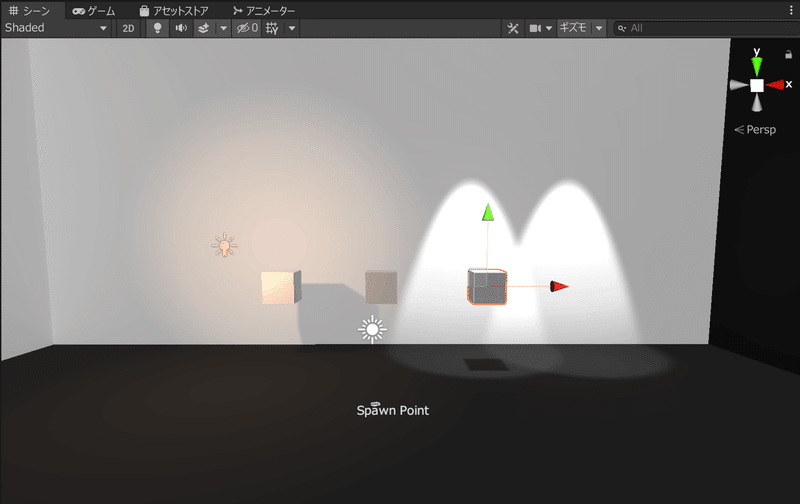
The point light can be set like this. Adjust the range, color, intensity, etc. of the light while viewing the scene.
Please make sure to set the mode to "Bake".
We chose the shadow type as "soft shadow" for the soft natural shadows.

The spotlight can be set in the same way, but adjusting the angle will be important. Please place it in use rotating tool or inspector Rotation numbers to control the angle and have a good lighting effect.
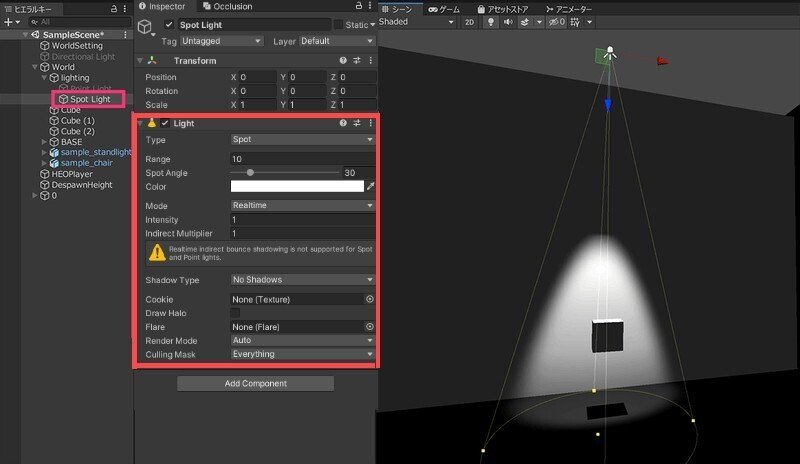
Again, be sure to set the mode to "Bake" .
The shadow type is set to "soft shadow" as an example .
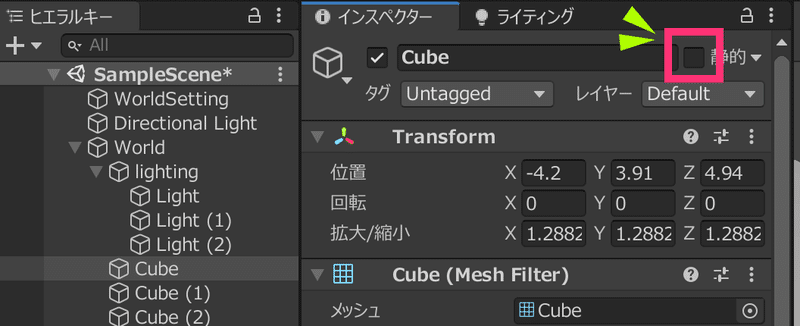
② Check "Static"
Check "static" for all non-moving objects you want to bake. By enabling Static box, all static settings inside it will be enabled, including the Contribute GI, which designates the object to be affected by baked lights.
The checkbox is on the top right side of the inspector.
Check the floors and walls as well.

(3) Lighting settings
Press Window > Rendering > Lighting Settings.

The lighting window of Unity will show up. We will use a part of Unity's functions to generate the baked lightmaps. See the below screenshot for the example.
* HDR color can be edited by clicking "HDR" to the right of the ambient light color.
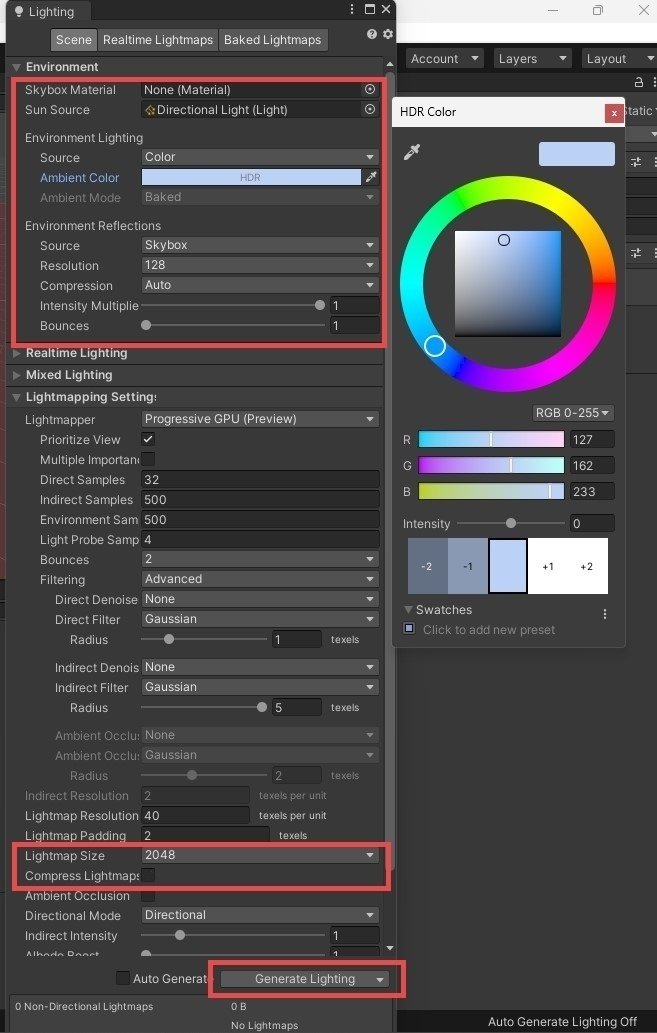
・Lightmap size: 2048 or 1024 would be good.
・Uncheck "Compress lightmap".
④ Start baking
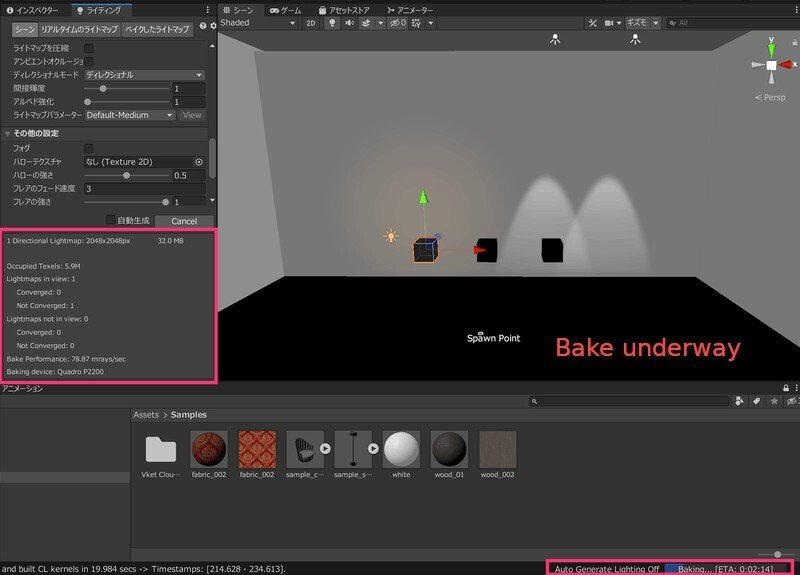
After completing the settings, press “Generate Lighting” at the bottom right to start baking .
While baking, a gauge will show up at the bottom right, showing the progress of the bake. You can see how the scene is baked little by little.
The required time to bake varies depending on the specs of your computer, the number of lights, resolution, and other factors. Please be patient⌛
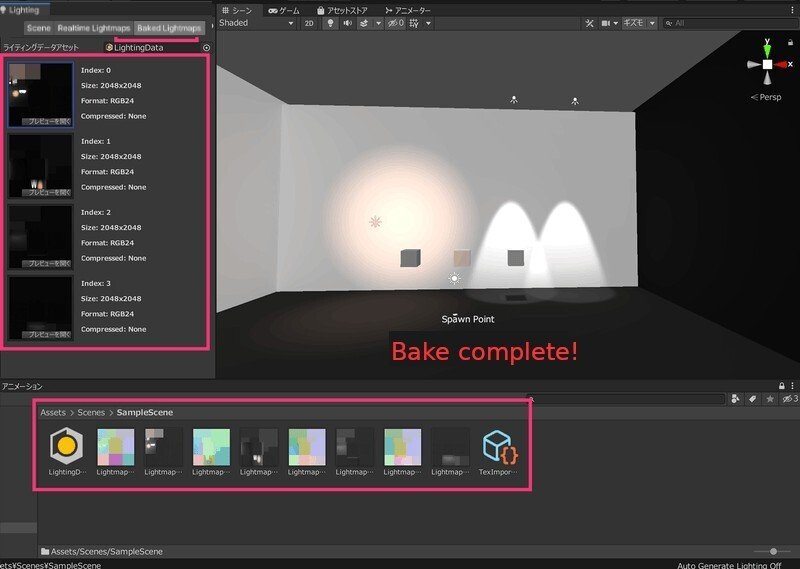
Did the bake complete successfully?
Once complete, check the "baked lightmap" tab of the lighting window to see the baked texture.
It is also saved in the Assets file.
⑤ Review and correct
Let's check if the lighting is done properly!
Here is the comparison between bafore baking and after baking 👀✨
<Appearance before baking>
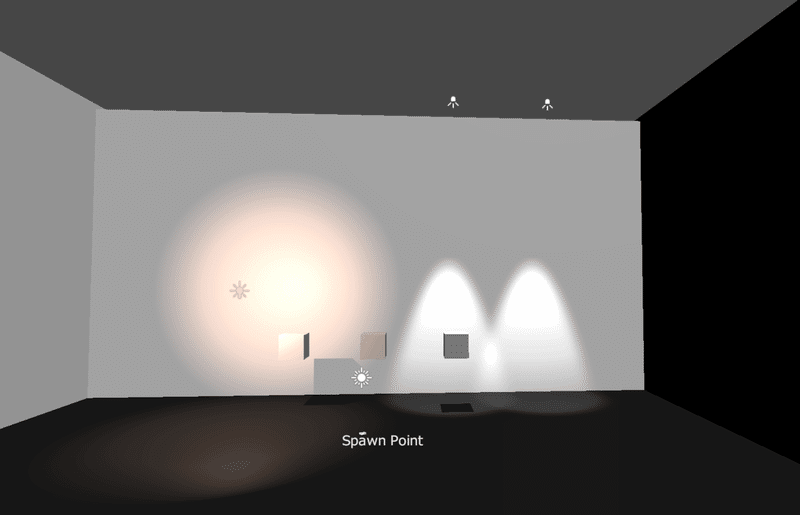
<Appearance after baking>

Can you spot a problem?
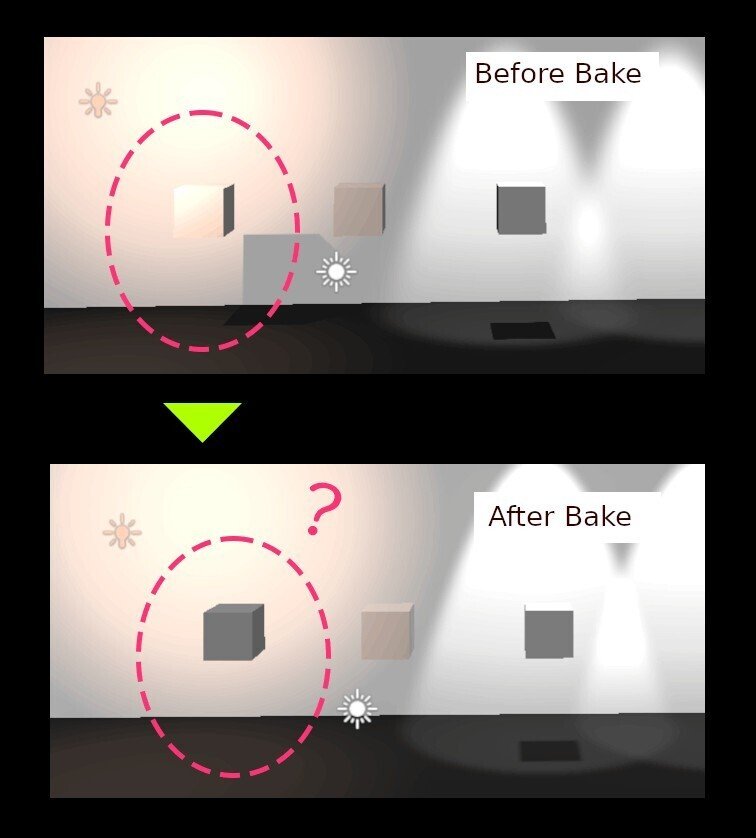
The leftmost box is not illuminated 💦
There is no shadow...
This is caused by the failure to check the "static" of the object .
It's a common mistake, so please check the static setting if you encounter simialr situation!
Also, if you move a baked object, you'll notice that it leaves a shadow. Since the shadow is "baked", it won't move in real time even when the object moves. 😲 As such, it is not recommendable to check the static box for objects that may move.

We need to fix these issues. Click the "Clear Baked Data" that appears when you press the down arrow to the right of the "Generate Lighting" button. This will remove the bake results.

The lightmaps and the textures that were in Assets are now empty!

Now that it has been reset, let's press the "Generate lighting" button again and bake (step 4).
The baked lights looks natural this time!
Once satisfied, it's time to build your world🌎

The appearance may be slightly different, but repeat the adjustment and baking work several times. Aim for a natural lighting!