【How to make a world:First steps vol.2】Create a room


Now that we've covered the general overview in the previous article ( Beginners vol.1 Overview ), let's finally create the contents of the world!
In the First Steps course, the goal is to create a simple world with walls and floors that can be run.

★If you have not yet registered an account or installed Vket Cloud SDK, please refer here first.
[Preparation]
① Set up your account and world
➁ Install Unity and VketCloudSDK
★ If you don't know how to operate Unity , we cover the basic operation of Unity at the First Steps vol1.5. Please take a look!
Elementary vol.1.5 Basics of Unity Operation
STEP1: Let's make the floor!
Now, let's finally get to work with Unity.
Firstly, let's learn the basic operations while creating a simple room.
We also have a tutorial world with sample scenes!
① What to do first
When creating a world for Vket Cloud, the very first thing you should do is to call "Add essential objects for Vket Cloud".

Right-click in the hierarchy > Add essential objects for Vket Cloud and you will see some new objects added to the hierarchy.

Main Camera: Not used.
Directional Light: A light that illuminates the entire world. Not used.
WorldSetting: The part that manages various information of the world.
World: Place to put objects in the world.
Player: Position where the avatar appears when loaded.
DespawnHeight: Height at which the avatar is removed and respawns.
➁Let's make a floor
Next, let's place an object that will be the floor.
Place the cursor on the World in the hierarchy and Right Click > 3D Object > Cube. A white cube will appear in the scene.

We will change the size of the cube.
You may change the size directly in the scene with the Scale Tool or Rect Tool on the top left, or change the numerical values of "Scale" in the Inspector.
Refer to the video and use whichever method you prefer to make the shape of the floor.

For clarity, let's change the name to "floor".
Changing the name in the inspector also changes its name in the hierarchy. Only alphanumeric characters are allowed . If you enter Japanese, it will cause an output error, so be careful!

Let's build a wall!
Now that we have the floor, let's make the walls.
For practice, we will only make two sides.
Select the "floor" created earlier in the hierarchy, duplicate it with "Ctrl+D" or copy and paste with "Ctrl+C" and " Ctrl+V ".

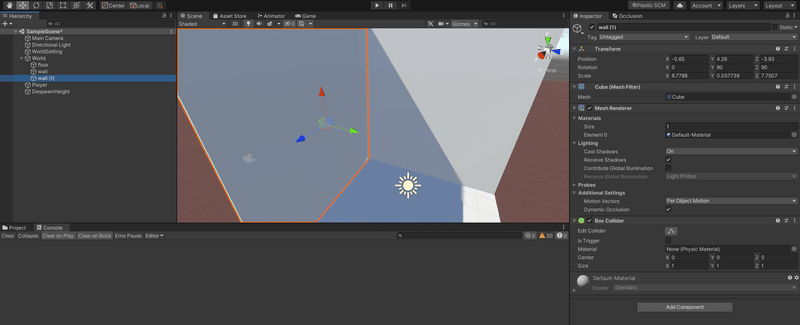
You will see that a new item " floor(1) " has been created below. Let's rename it "wall".
The wall is overlapping with the floor. Rotate it 90 degrees.
There are two methods: " Rotating in the scene" and " Rotating by changing the values in the inspector" .
This time, the angle is fixed, so let's rotate it with a numerical value.
Enter 90 as the Z value for Rotation in the inspector.
Use the move tool to move it to the desired location.

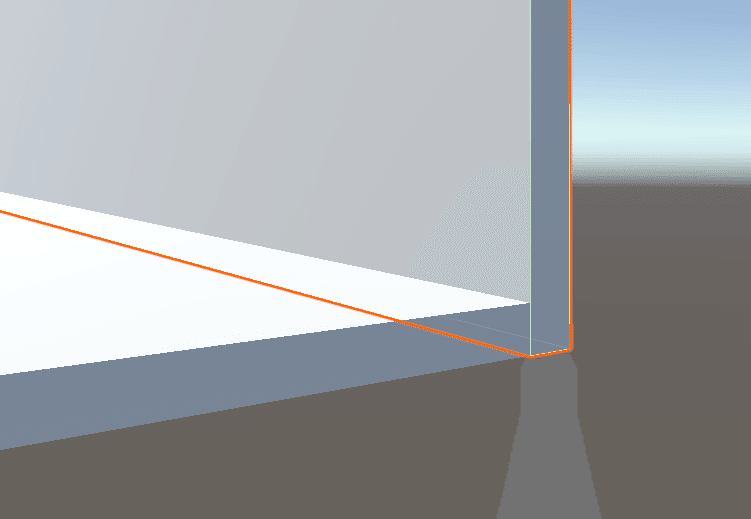
If you want to align it exactly with the vertex of the floor, you can place it neatly by moving while pressing the "V" key.
Now create the second wall.
Select "wall" in the hierarchy and press " Ctrl+D" to duplicate it.
Rotate the new object "wall(1)".
Now set the rotation " Y " value to 90 and move it wherever you want.
We now have floors and walls!
Thank you for your hard work! !
Let's add some color!
Finally, let's add some color for better visibility.
Select " Assets " in the project. Right click > Create > Material, and a sphere will appear in the list. This is the material file.
Change the name to distinguish it.

Next, click the color area on the right side of "Albedo" in the inspector to display the color information.
Please change it as you like.
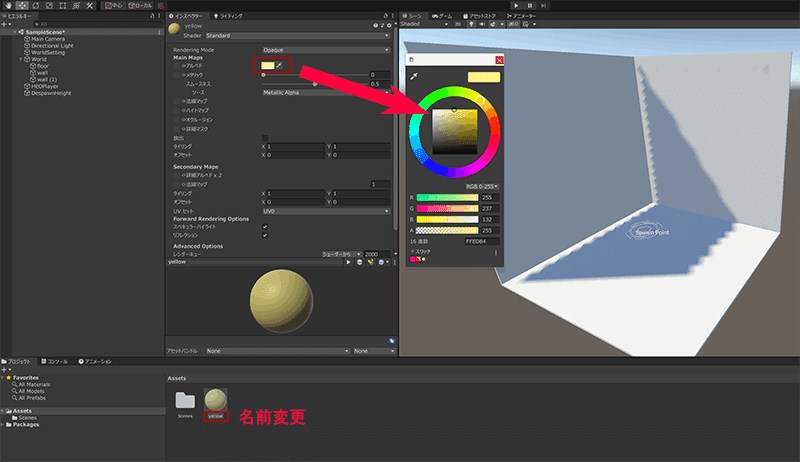
To apply the color to an object, throw the material from the "Assets" list into the desired location in the scene by "drag and drop".

The material can be metallic and shiny, or you can apply your favorite texture. Please try various things!
Next chapter → Build and upload your world