How to Decorate an Image【HEOPlane】

Just as you would decorate your real room with pictures and photos,
wouldn't you like to decorate your Metaverse space with digital images?

In Vket Cloud, there are two methods for this:
"Paste a material on a Unity plane" or "HEOPlane".
We will explain them one by one.
Let's take a look at the steps!
How to paste a material on a Plane
❶ Image preparation
First, prepare the image you want to decorate.
There are some rules, so let me explain.
1⃣ Must be in png format
Vket Cloud can use png format , so let's convert jpg format images.
Also make sure the extension is lower case ( .png ), not upper case ( .PNG ).
Uppercase letters will cause an error.

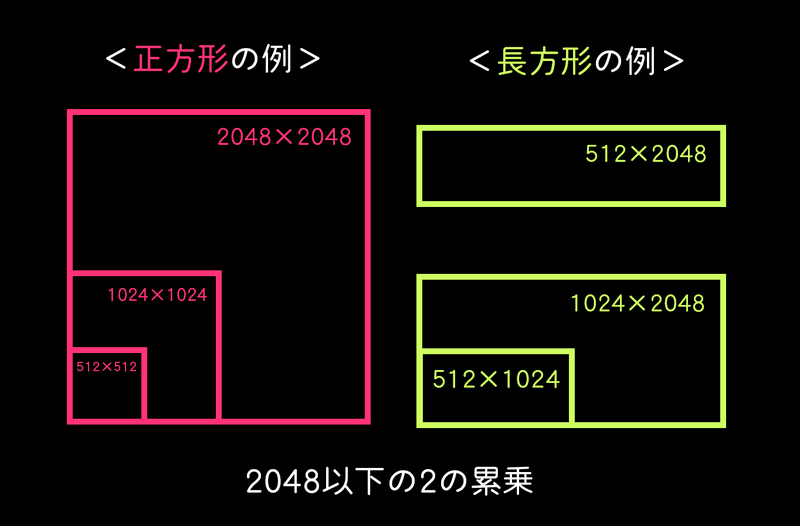
2⃣ Size is 2048 or less
The size of the image is limited to 2048 x 2048 or less in power of 2 size.
It doesn't matter if it's square or rectangular, just remember that it's a power of 2 no greater than 2048!
3⃣ Total size is 80MB or less
Image size must be less than 80MB in png equivalent for all totals used in the world .
4⃣ Bit depth is 24bit or 32bit
In general, higher bit depths provide higher quality and more accurate information representation, but tend to result in larger file sizes.
You need to choose an appropriate bit depth according to your usage.
Set the bit depth to 24bit or 32bit.
Use image editing software such as Adobe Photoshop and adjust the settings as needed.
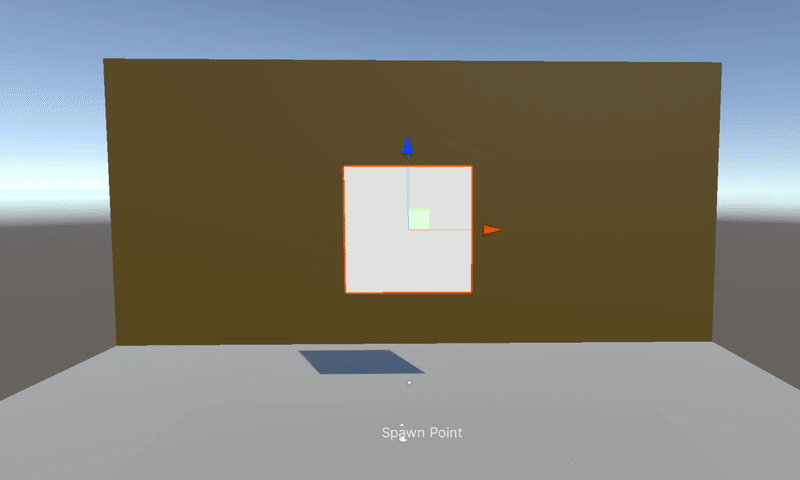
❷ Placing a plane
Then, place a flat surface where you want to paste it.
Here we start with only the floor and walls.

Let's add "Plane" by right-clicking on "World" in Hierarchy > 3D Object > Plene .

Rotate and move it to place it where you like.
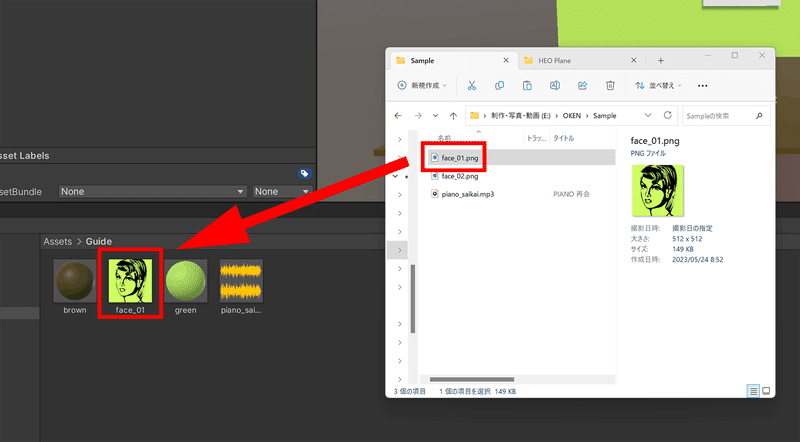
❹Import image data
First, add the image data prepared in ❶ to any folder in Unity's Project window "Assets".
❺ Create Material and apply it to Plane
Create a new material by right-clicking in Assets > Create > Material .
Changed the name for clarity.
Select the newly created Material and apply the image imported in ❹ to the □ on the left side of "Albedo" in the Inspector.
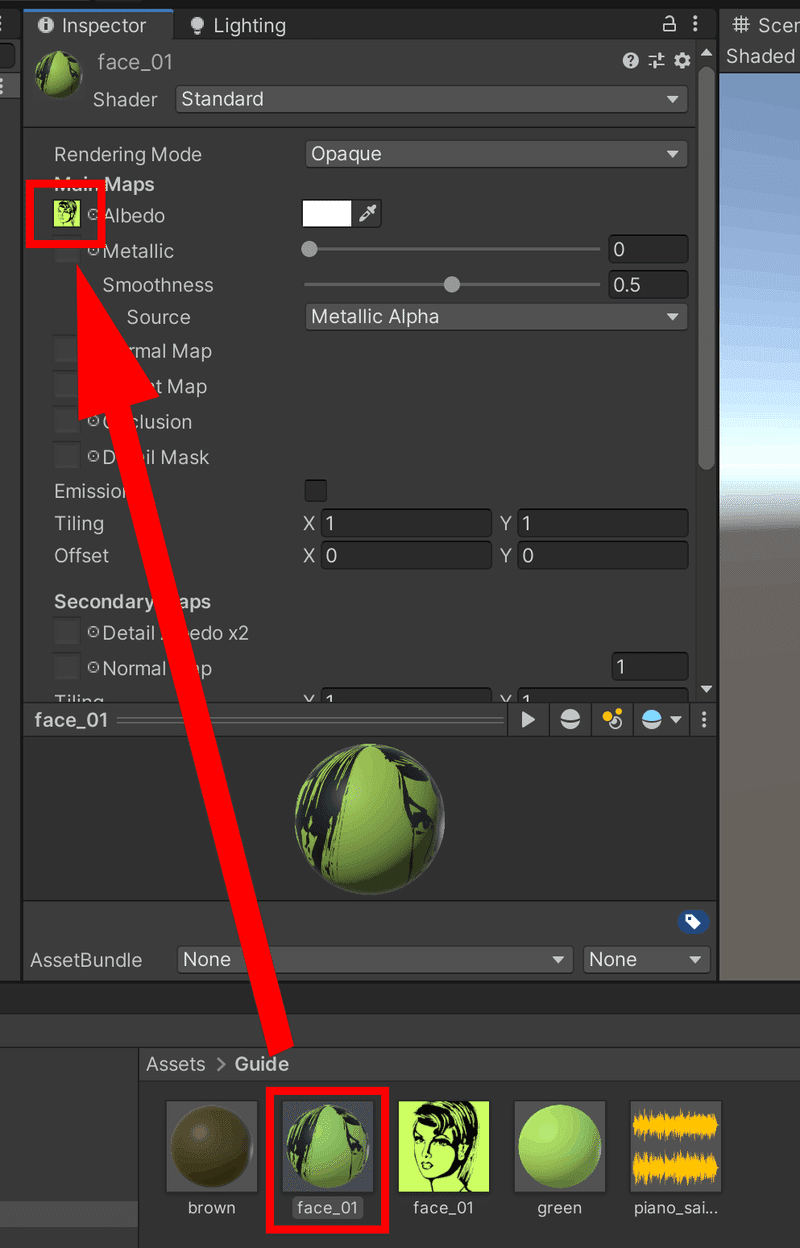
Next, apply that Material to the Plane of the Scene by dragging and dropping it.
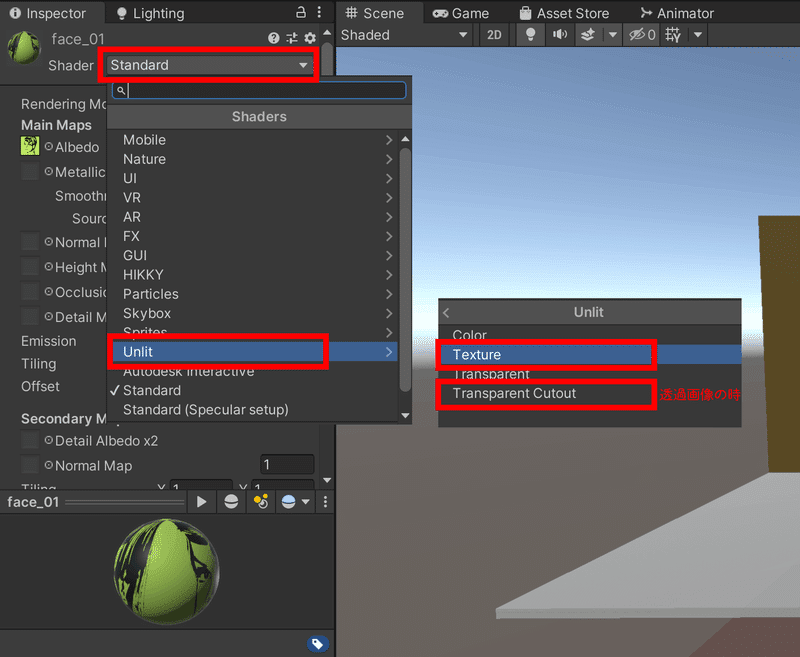
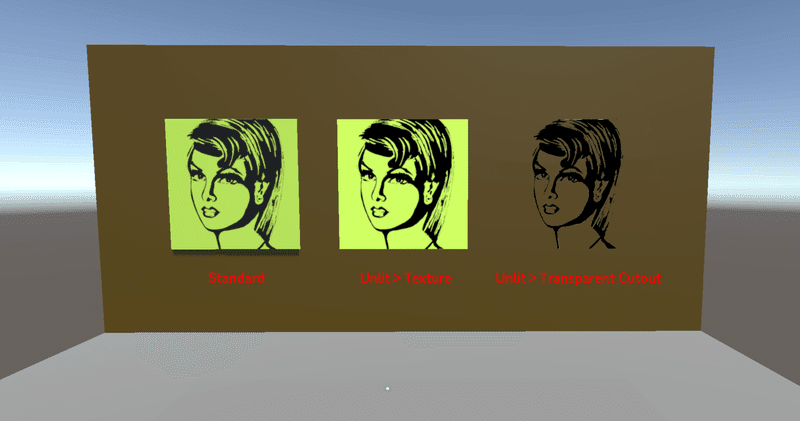
Shader is important here .
It is currently set to "Standard". This is a state that appears dark in dark places and is also affected by shadows.
In order to display the image clearly in any situation, we will change this Shader.
Select Material and click the "Standard" button next to Shader in the Inspector. Select Unlit>Texture.
For transparent images, set Unlit > Transparent Cutout.
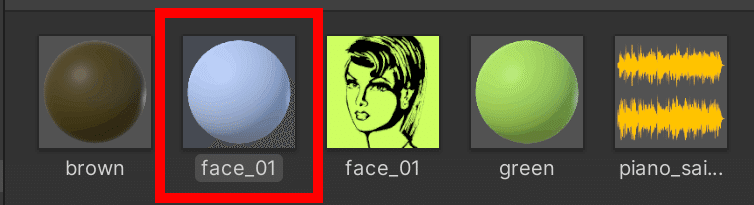
We arranged 3 types of materials so that you can see the difference in Shader.
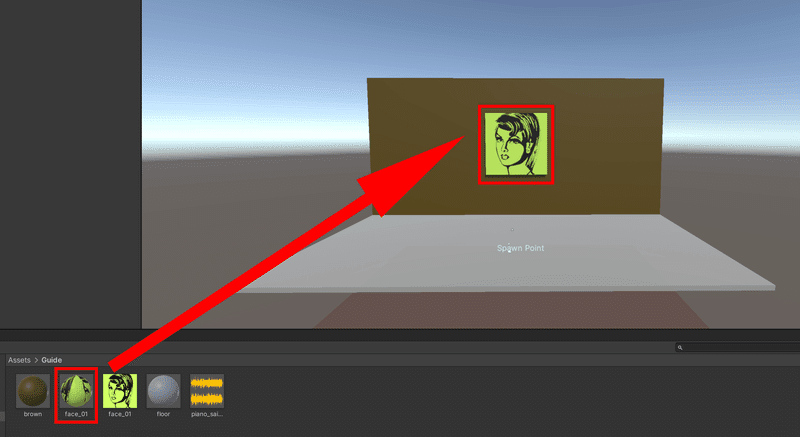
It looks like this in Unity's view.
Let's Build And Run and see how it looks!
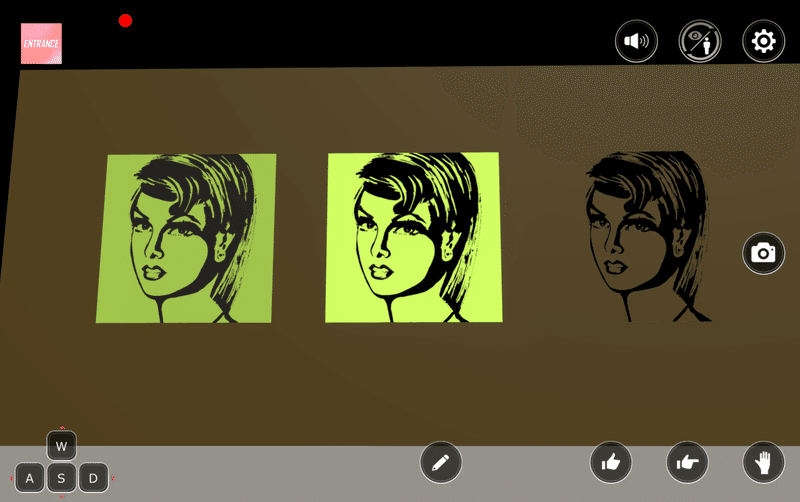
The initially set "standard" is affected by the darkness of the environment.
But "Unlit/Texture" is clearly displayed.
It is not affected by the environment and displays with the same brightness no matter where it is installed.
You can decorate your works and commemorative photos like this, and it seems to be used for various expressions!
Next, we will explain how to use “HEOPlane”, which is a function of Vket Cloud.
How to use "HEOPlane"
Apart from the previous method, Vket Cloud provides a component that allows you to easily display images.
That is "HEOPlane".
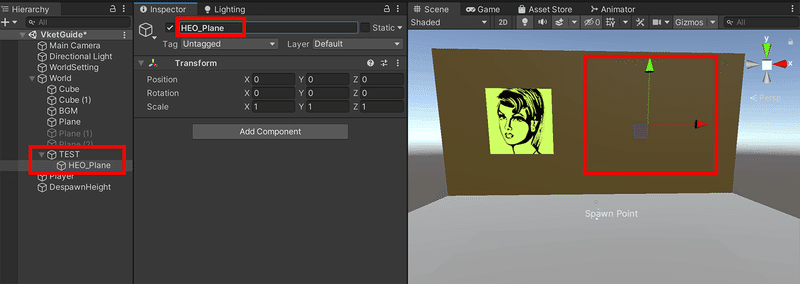
❶ Create an empty object
Right-click in Hierarchy > Create Empty
to create an empty object.

An item called "GameObject" is added. You may want to change this name to make it easier to understand. Let's call it "TEST".
Move it to the place where you want it to appear in the scene.
❷Add Component (HEOPlane)
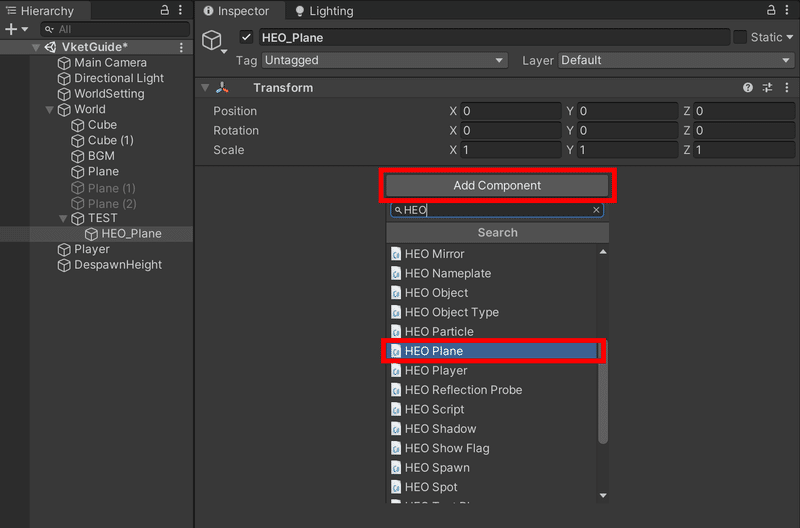
Create an empty child object with Create Empty, using "TEST" added in ❶ as the parent.
Select "TEST" > Right click > Create Empty
Change the name of the created "GameObject" to any name.
(Be careful not to overlap the name with others.)
Next, select the child object and add "HEOPlane" from "Add Component" in the Inspector.
❸ Image selection and item settings
Drag and drop the desired texture into "None (Texture 2D)" of the added HEOPlane.
This time, we want to display it as soon as we enter the world, so check "show".
If you want to always face yourself, check "Billboard".
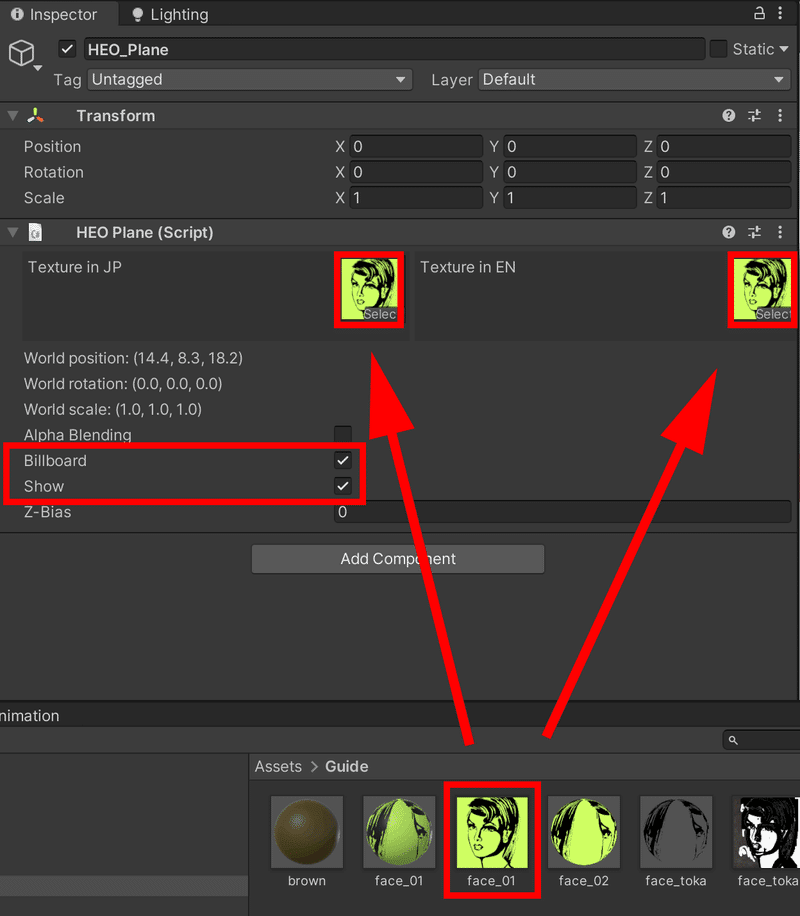
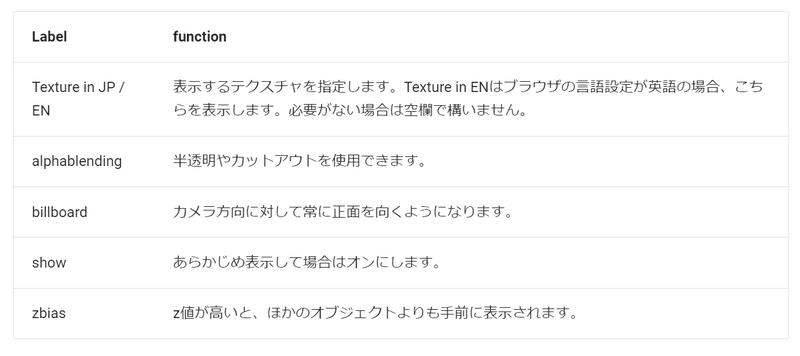
The explanation of each item is shown in the table.
Once you've made these settings, let's build and run.
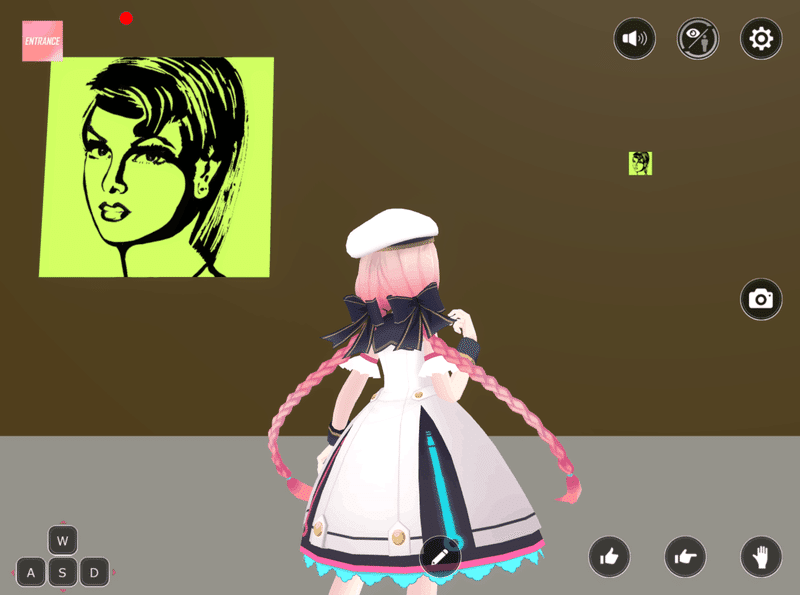
You can see it small on the right!
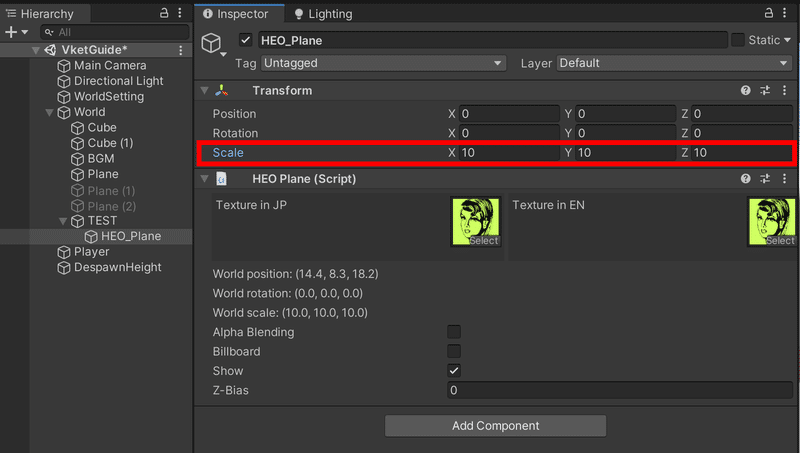
Go back to Unity and resize.
❸ Change size
Adjust the displayed image size by changing the "Scale" value in the Inspector.
We set the "Scale" value to 10.
Let's Clear Cache and then Build And Run again.
The size has changed!
It is also possible to display images using "HEOPlane" like this.
❹Transparent image settings
If the set image is a transparent image, please check "alphablending".
It can be a little tricky because you don't know how it will look without building it.
Try it in a way that works for you.
*Be sure to build and don't forget to clear the cache before running.
Clear Cache procedure
VketCloud SDK Manual for "HEOPlane"