

Avatar Pedestals, Videos, and more! Enhance your Vket exhibition creation using the Vket Booth Maker

Get ready to use "Vket Booth Maker"… a web browser based tool for creating your Vket2024 Winter exhibitions!
Learn about how to use new features added for the coming event!
What is Vket Booth Maker? Find out on our official website!
Learn how to use Vket Booth Maker on our previous tutorial!
🔸Avatar Pedestals
Vket Booth Maker can now add Avatar Pedestals to your exhibition, using the VketAvatarPedestal feature!
What is VketAvatarPedestal?
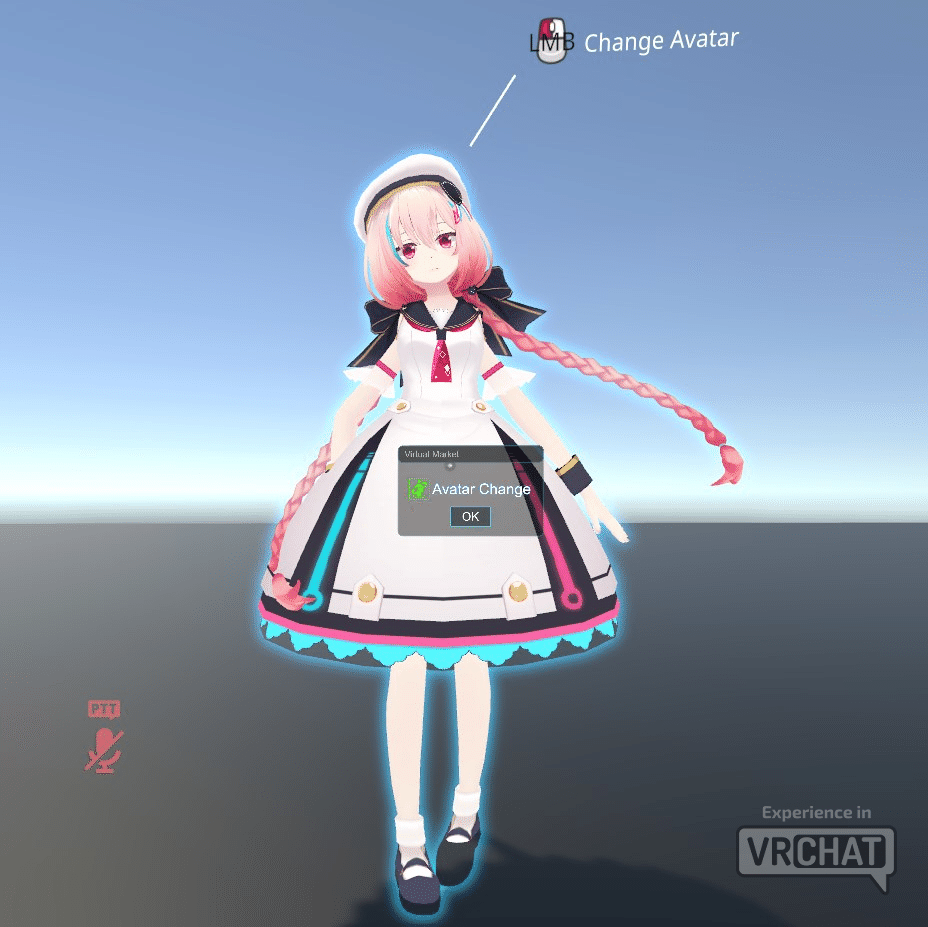
The VketAvatarPedestal is a feature allowing visitors in Vket to try on exhibited avatars.
By Interacting (Clicking) a VketAvatarPedestal , a confirmation screen will appear, which can be interacted again to change to the avatar!
Caution: Vket Booth Maker can only create "3D" (3D model) VketAvatarPedestals!
At Vket Booth Maker, exhibitors can setup an avatar pedestal for visitors, by placing a 3D model in the booth and linking an avatar Blueprint ID! (instructions on below)
*If you wish to use "Default" (VRChat avatar thumbnails) or "2D" (Image at your choice) type avatar pedestals, please consider submitting your booth using Unity: VketAvatarPedestal - How to Use
Instructions Overeview
1. Upload and Publish an avatar to VRChat
2. Copy the published avatar's Blueprint ID
3. Upload/Place the avatar to Vket Booth Maker
4. Link the Blueprint ID to the displayed avatar
1. Upload and Publish an avatar to VRChat
Preparation: Check your VRChat User Rank
VRChat has a user rank system filtered by played time and other user histories. As a new player, you'll start as a "Visitor," but as you play more, you'll level up to "New User" and be able to upload custom content. To check your current rank, simply log in to your VRChat account.
Environment Setup: Install Unity and Setup a License
To upload an avatar to VRChat, the current Unity editor version used by VRChat Creator Companion (VCC) is required with a license.
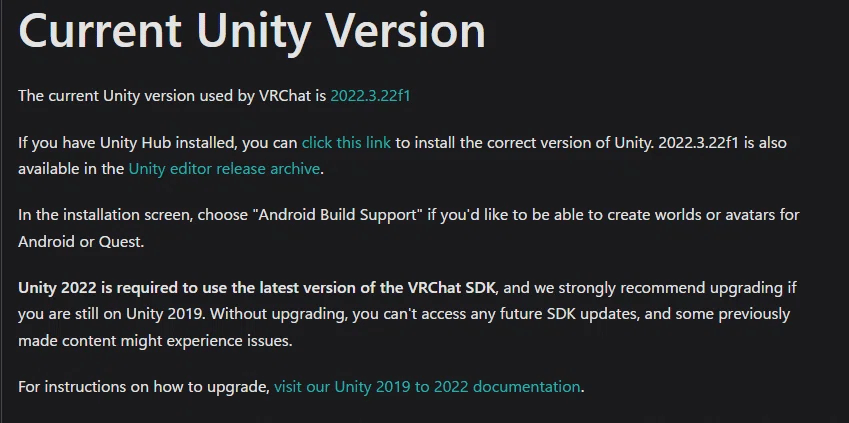
Check VRChat's Current Unity Version to know the required Unity version! As of October 21 2024, current version is 2022.3.22f1.
This edition can be installed after you've installed Unity Hub.
Installing Unity
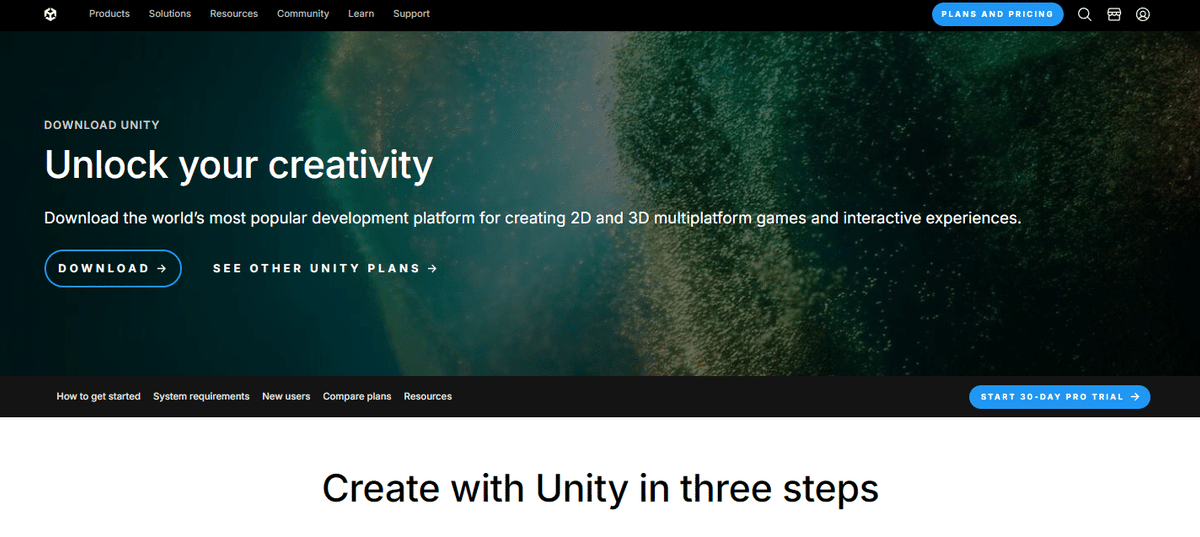
Access Unity's Download page to install Unity Hub.
Unity Hub can be used to handle multiple editor versions and projects!
Set a Unity License
What is Unity License?
Licenses authorizes users to use Unity editors. Depending on license plan, users can access various features and support provided by Unity.
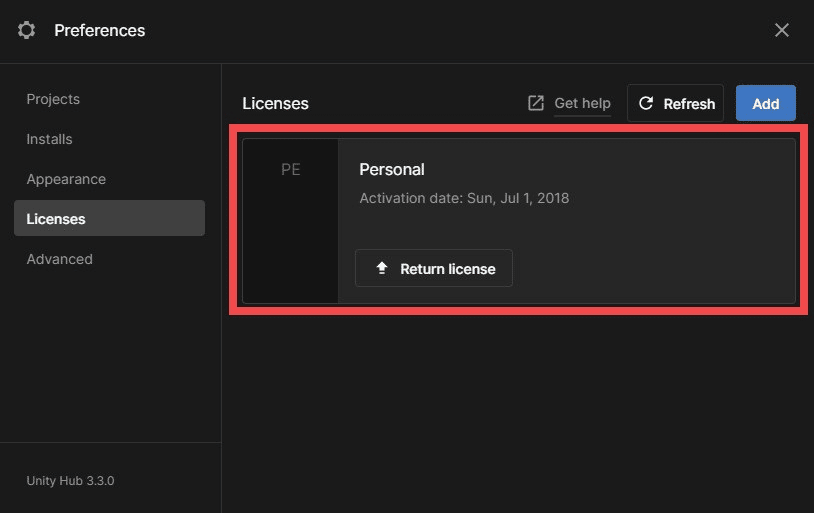
Open Unity Hub and access "Manage licenses" to view your licenses.
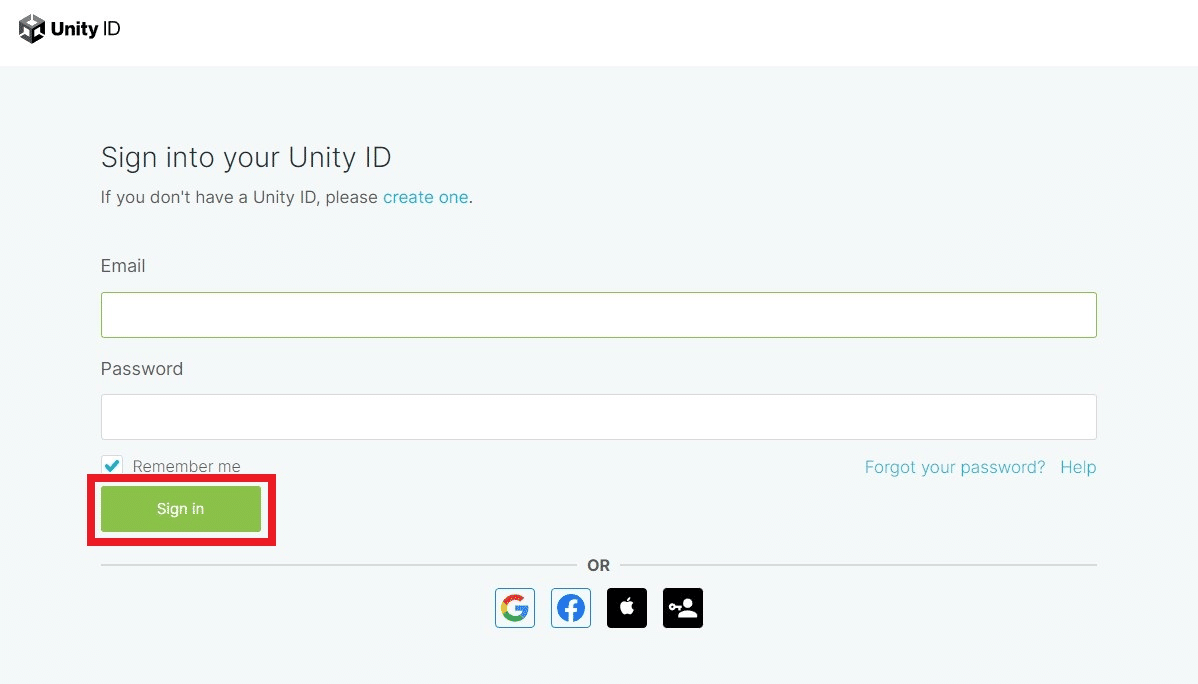
Sign in to your Unity account, or create a new one if you don't have any yet.
Select "Add" --> "Get a free personal license" in the license page on Unity Hub to obtain a Personal license.
Installing VRChat Creator Companion (VCC)
Next, install VRChat Creator Companion (VCC) to setup an environment for uploading your avatar!
Download the VCC
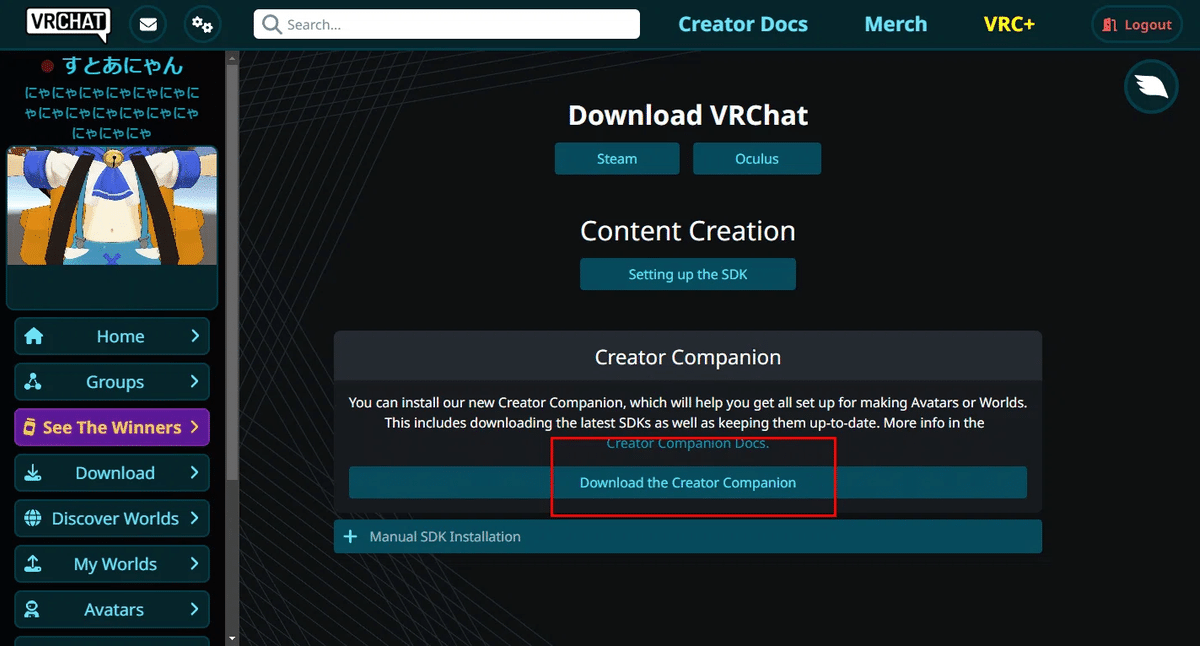
Access the VRChat official website, and download the Creator Companion on "Download" page.
Setup VCC
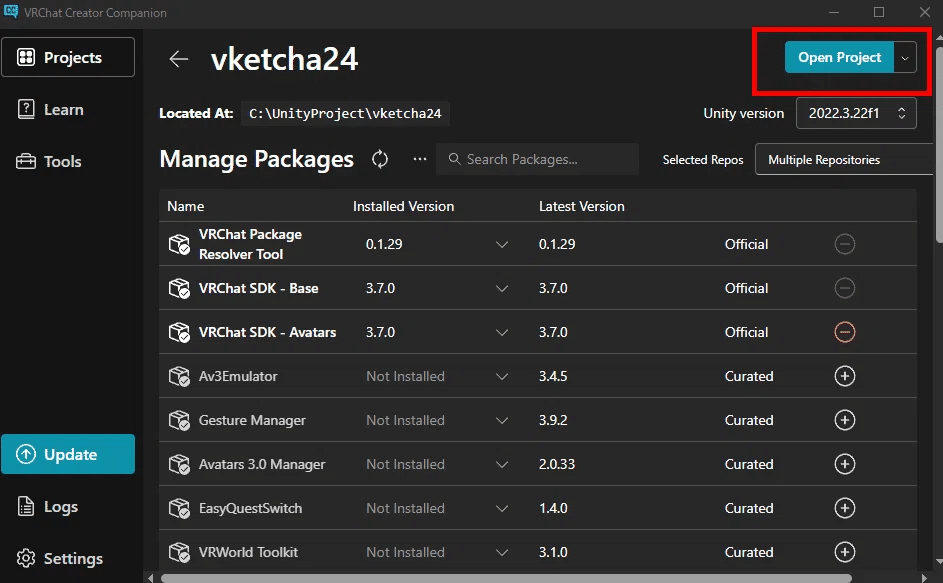
Open the installed VCC and designate the installed Unity editor path. Other guides may popup on first setup, so follow VCC's instructions!
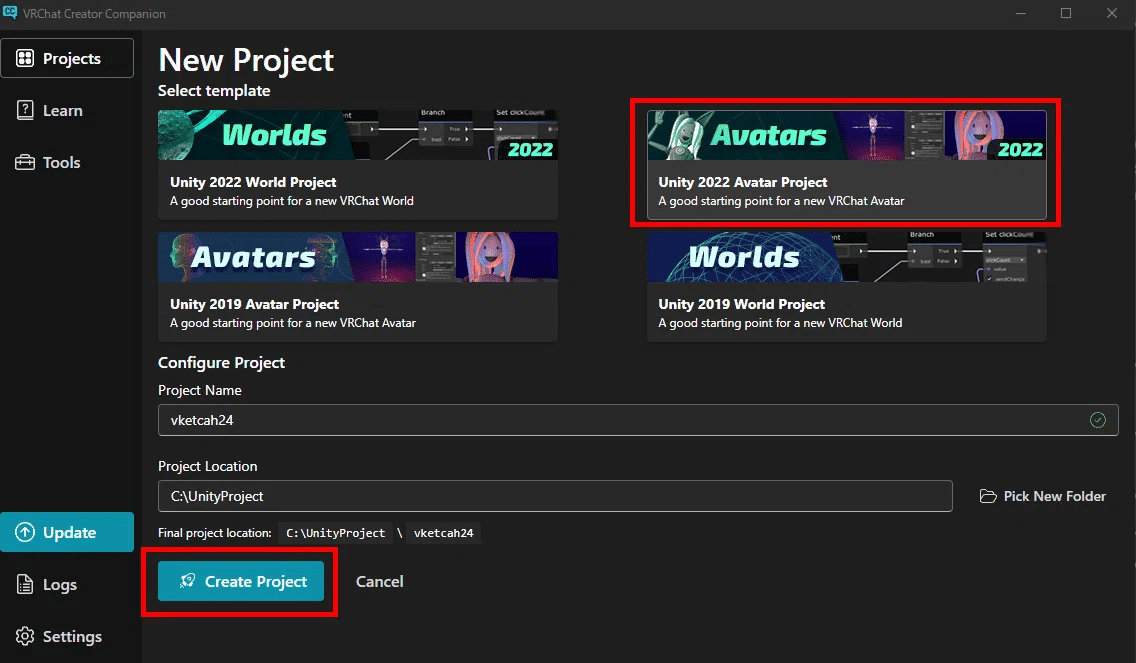
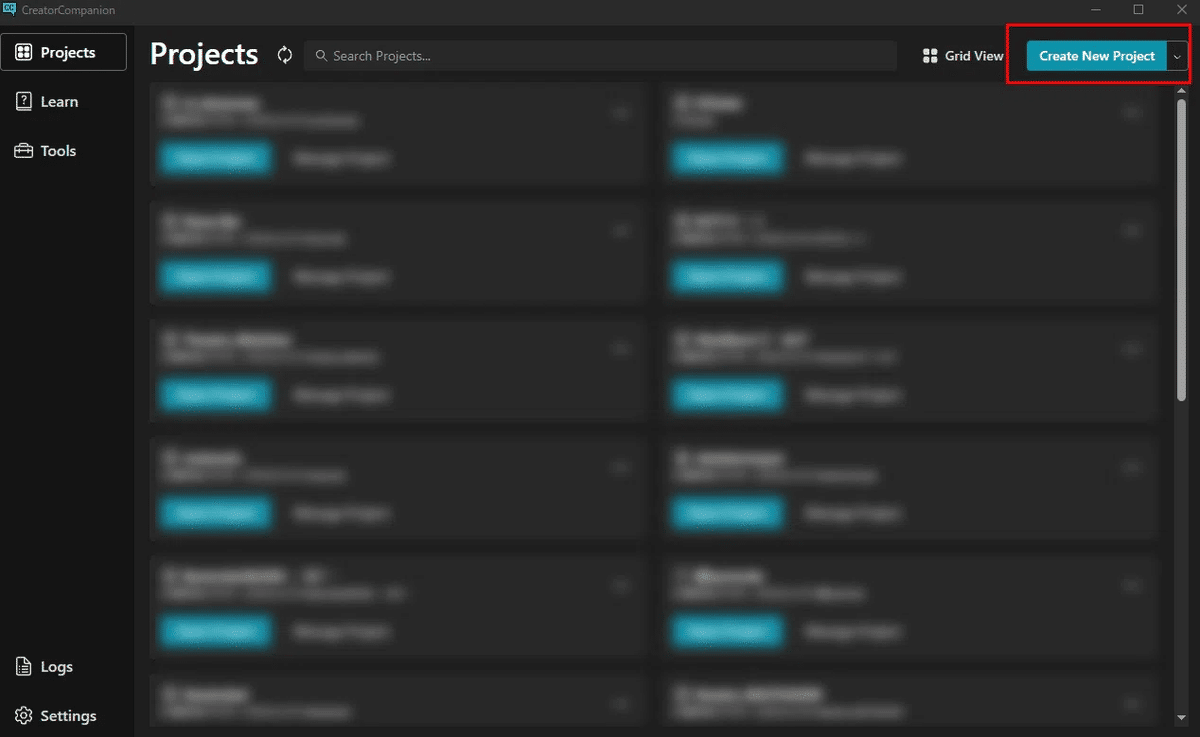
Create a new "Avatar" project by setting a project name and location. Designate a location that can be handled easily!
Avatar Setup
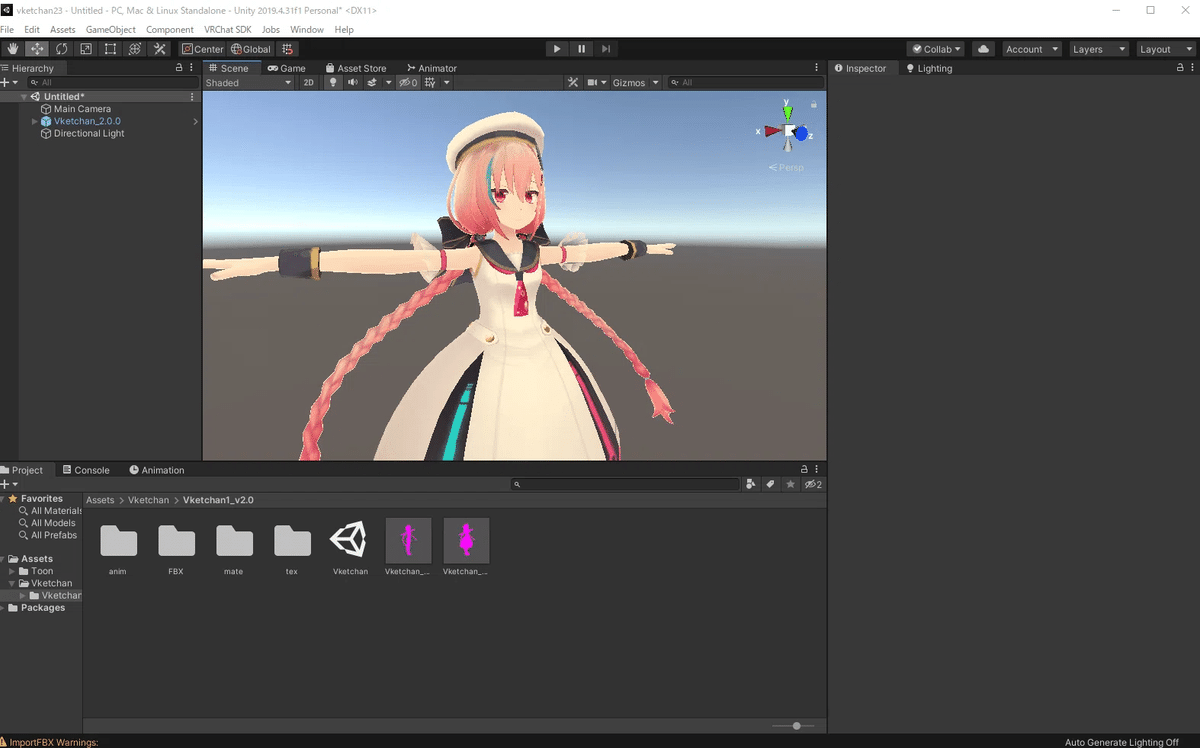
After creating a project, import your avatar creation to Unity and upload to VRChat! As an example, VketChan 01 will be used:
Import Avatar
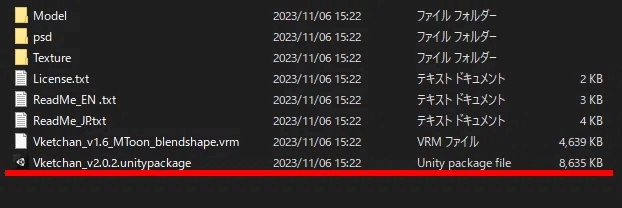
After opening the Unity project, double-click the Unitypackage file or drag and drop to import the avatar data.
If shaders and other files are required by the avatar, be sure to import those as well!
Avatar Upload
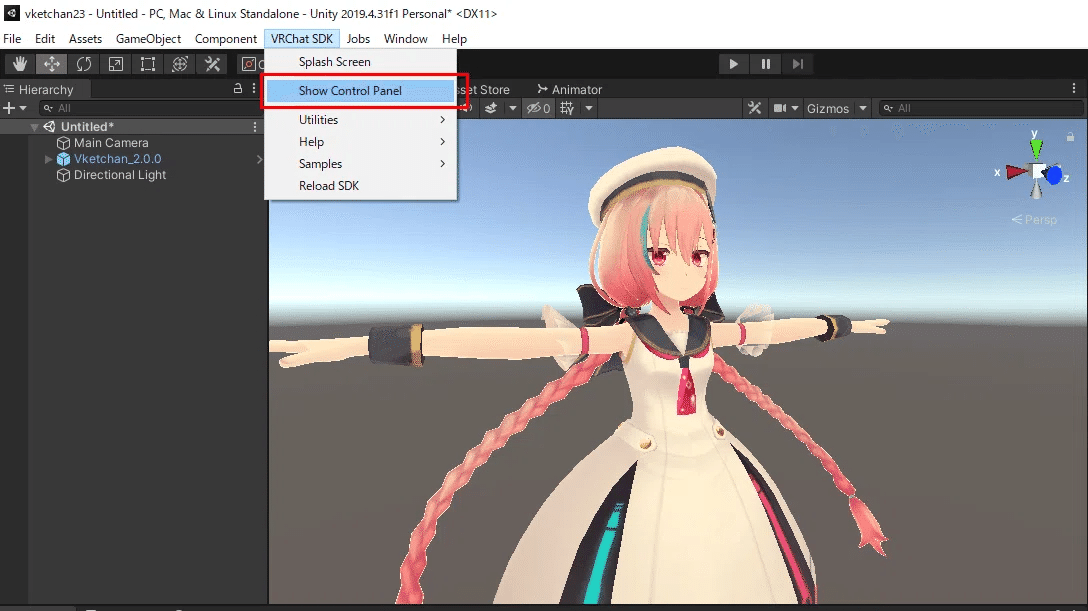
Click "Show Control Panel" in the VRChat SDK menu to open the SDK Control Panel.
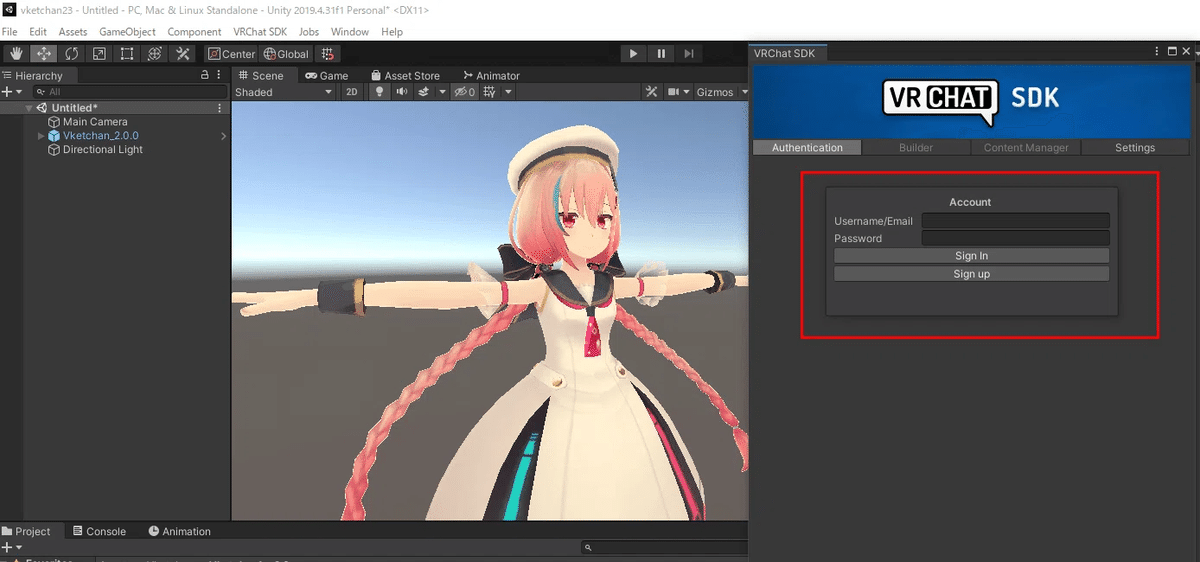
Sign in to your account to start uploading.
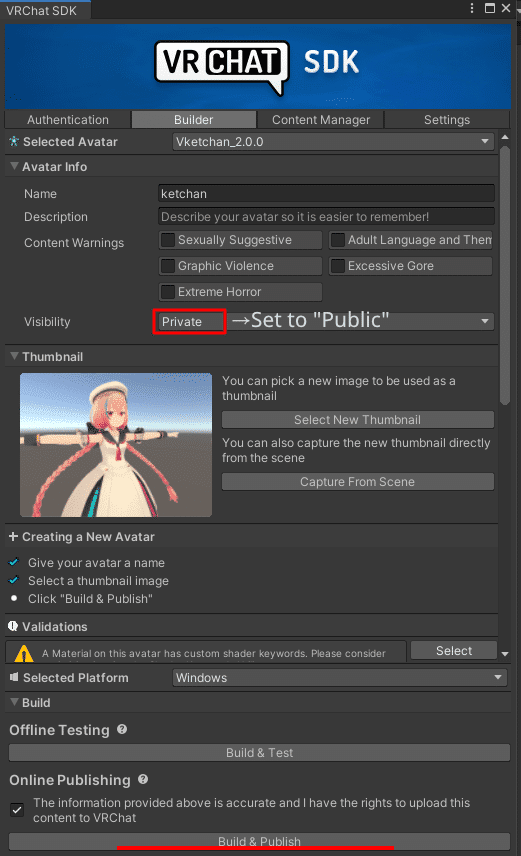
Setup an avatar name, thumbnail, and other details including setting visibility to "Public."
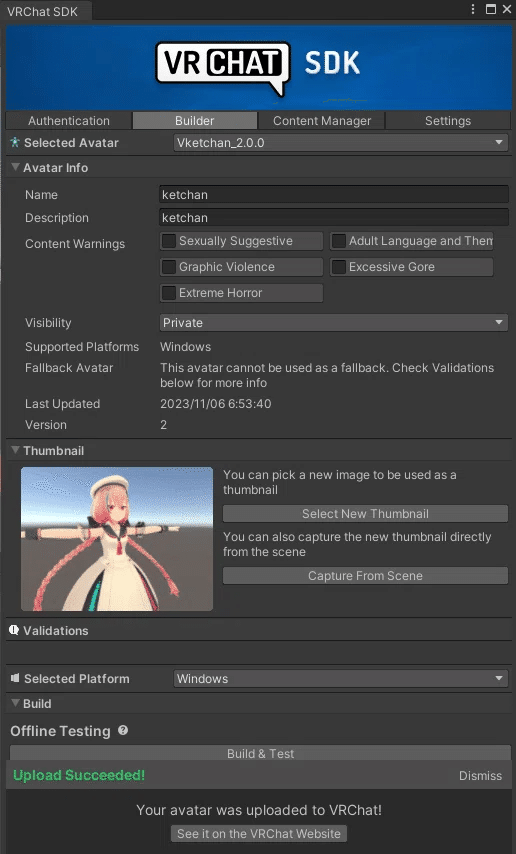
Press "Build & Publish" to finalize your avatar upload!
If you wish to set an existing avatar to "Public," Open the "Content Manager" to click "Make public" on the avatar, or reupload by changing visibility settings.

2. Copy the published avatar's Blueprint ID
How to view the avatar's Blueprint ID
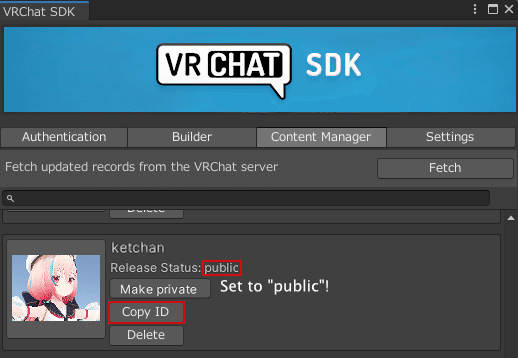
The Blueprint ID is located in the "Content Manager" tab in the Control Panel, which can be accessed by clicking "VRChat SDK" --> "Show Control Panel" on the top menu. Click "Copy ID" to copy the avatar's blueprint ID to the clipboard.
Please make sure that the avatar's release status is "Public," as private avatars cannot be used on avatar pedestals.
3. Upload/Place the avatar to Vket Booth Maker
To use your avatar on Vket Booth Maker, uploading on My Vket will be required!
As avatars on My Vket are handled in VRM format, conversion is required if the avatar model is in fbx.
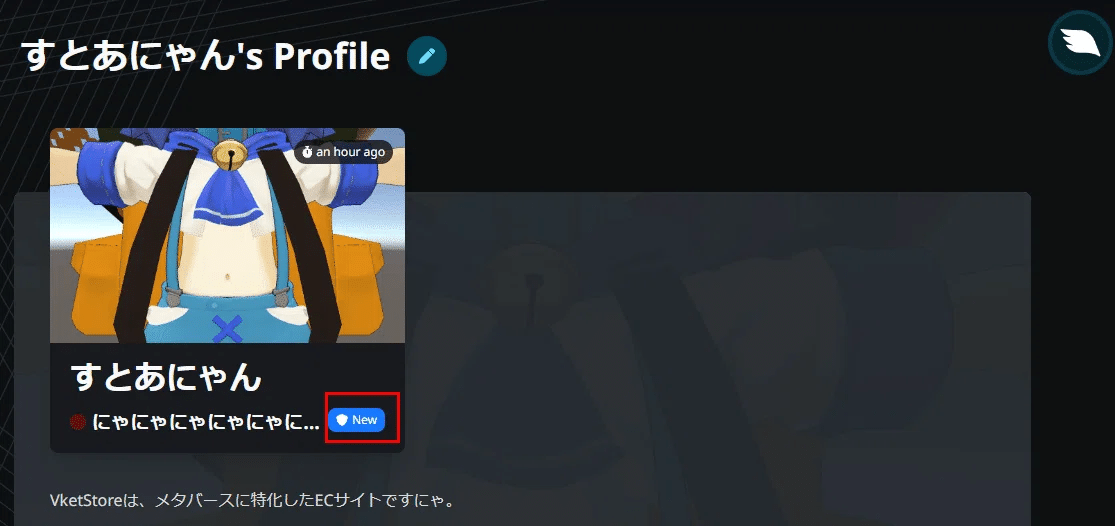
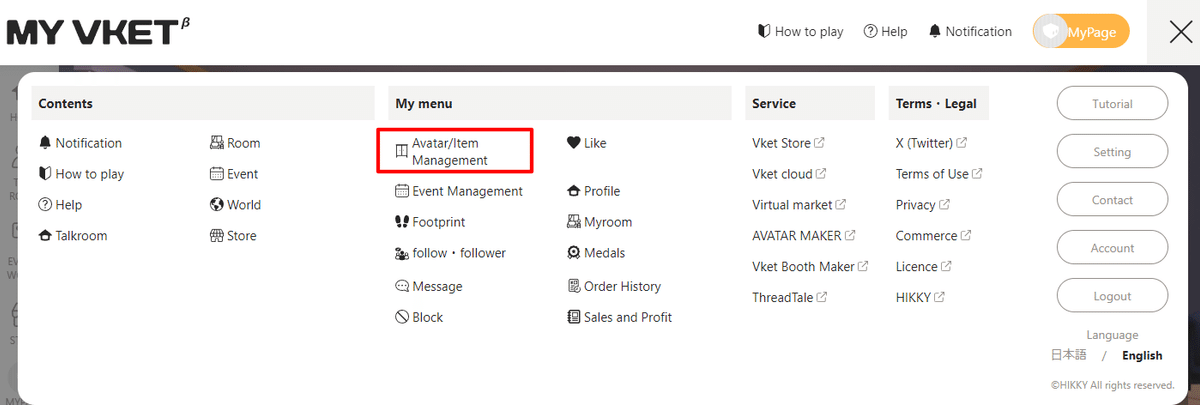
To start your avatar upload, open My Vket and select "Avatar/Item Management" page in My menu.
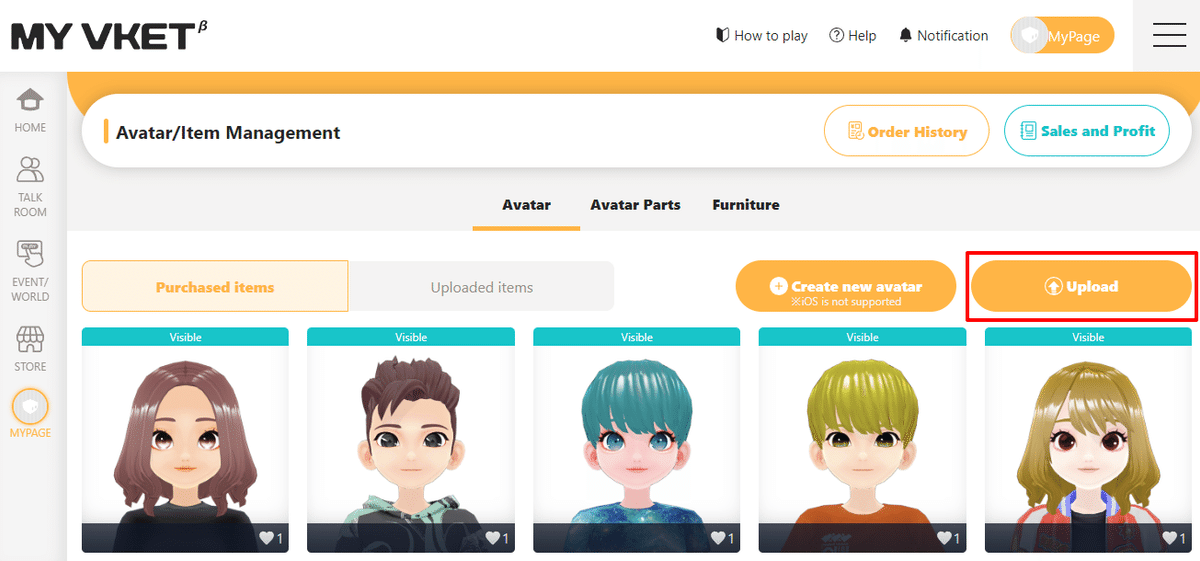
Select the "Avatar" tab to view the avatar list, and click "Upload" to start with your upload!
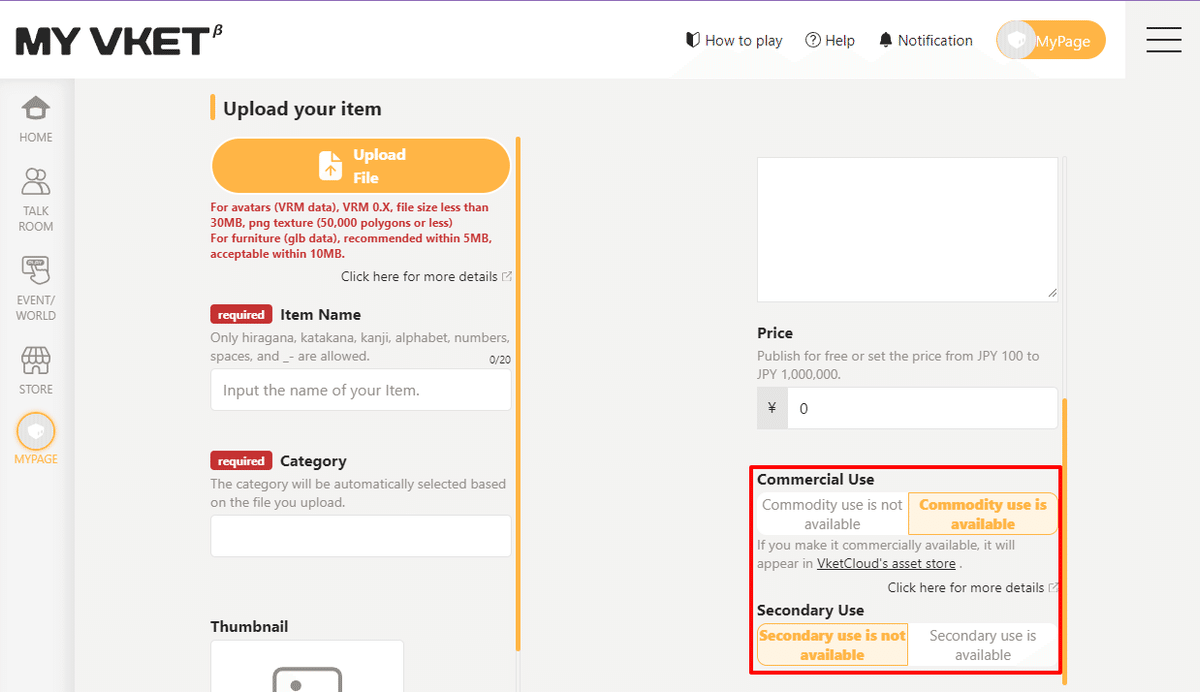
If you wish to allow other users to use your avatar, set the visibility to "Visible."
*When avatar is set to "Not visible," it will be only revealed to you.
*Visibility on My Vket and VRChat (Vket) is not related. Therefore, you may set the visibility on My Vket to "Not visible" and proceed to display your avatar on Vket's avatar pedestals!
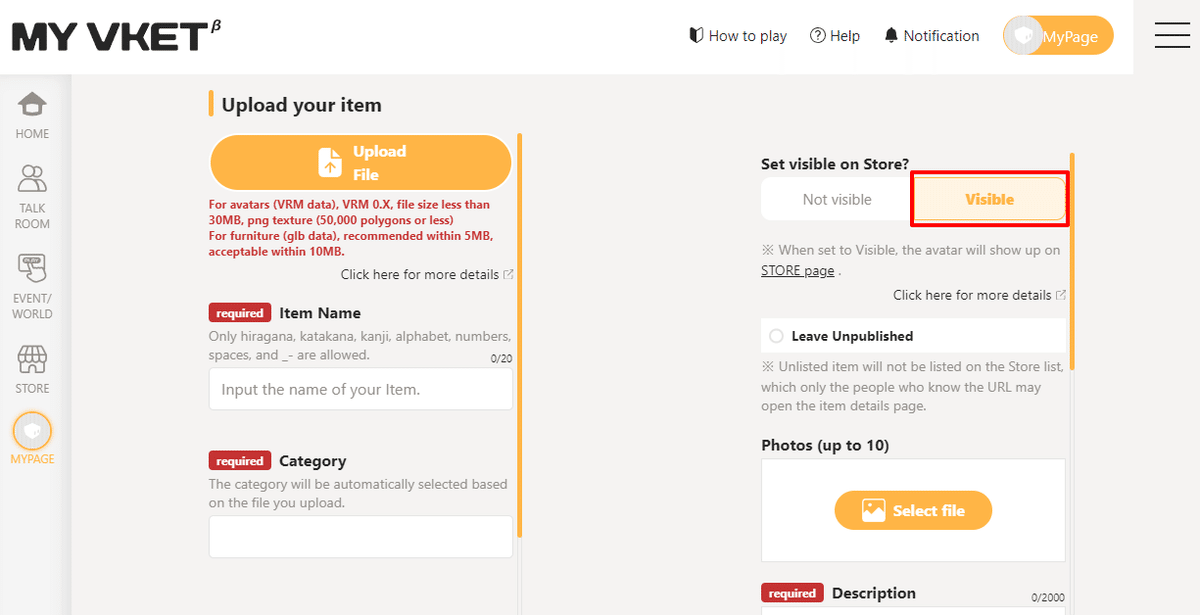
When set to "Visible," further settings including description, price, and use property will be required to publish on My Vket's store.
After completing upload, open the Vket Booth Maker to go on with the editing.
See the article below to learn how to use the Vket Booth Maker:
After opening the Booth Maker, select the "NPC Avatars" button to place an avatar in your exhibition.
The list of available avatars will be shown.
In the "Preset Avatar" tab, avatars provided by My Vket will be shown:
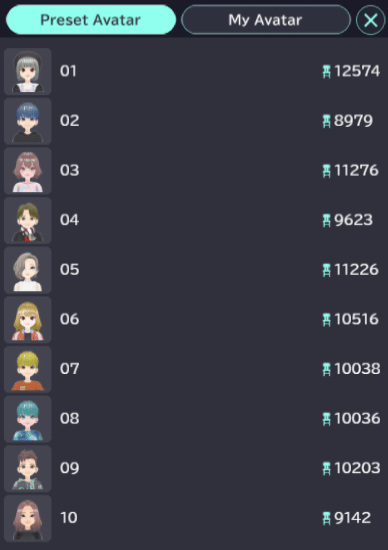
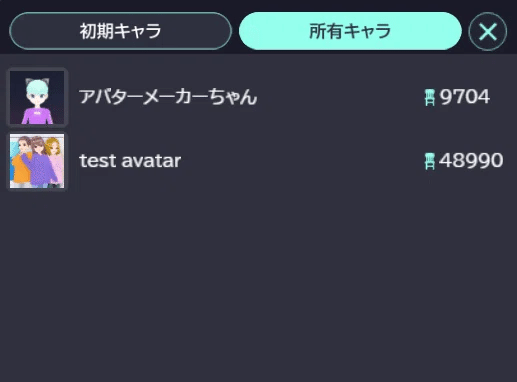
To view your uploaded avatars and purchased avatars, click the "My Avatar" tab!
Clicking an avatar will place the avatar in the space.
Customize the placed avatar to your exhibition!
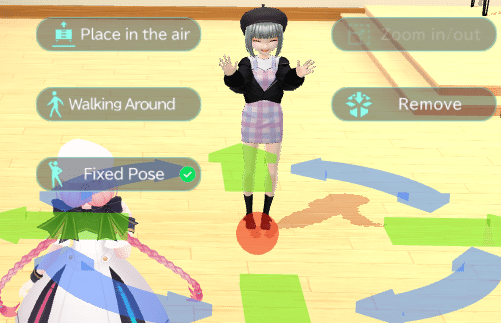
By default, the avatar is set to "Walking Around" mode, which should be changed to a "Fixed Pose" to display in an exhibition.
*A "Walking Around" mode avatar will be displayed in the default pose (A-Pose Standing) in the actual Vket exhibition.
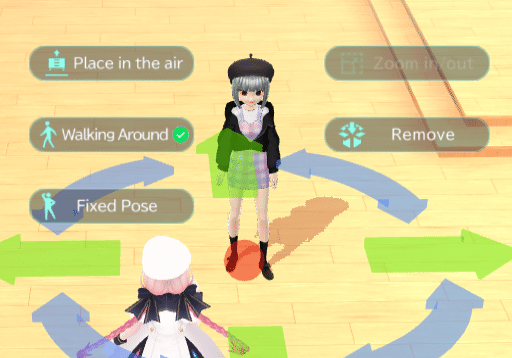
Click the "Fixed Pose" button to select from a variety of poses and expressions for your avatar.
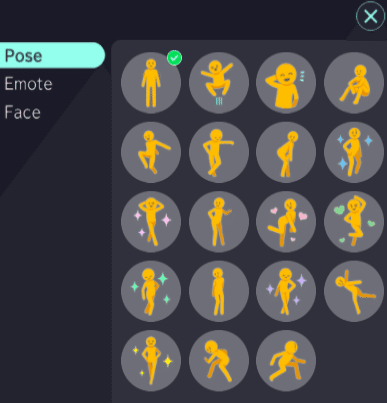
Pose
Avatar will take a designated pose.
Emote
Avatar will do a short animation in a loop. (e.g. dance, wave hand, etc.)
Face
Avatar will change facial expressions.
*The original VRM data must have a facial expression setup.
*Even if the expression does not appear on My Vket spaces, the designated expression will be shown on VRChat.
*All of the above can be exported to VRChat, which Emote will be played in a loop animation as display.
After designating a pose, place the avatar in a desirable position.
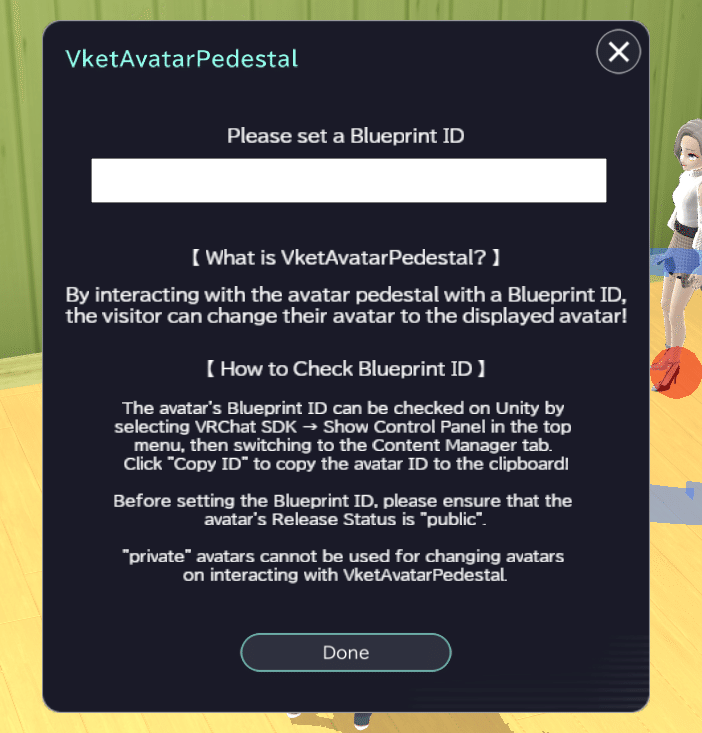
4. Link the Blueprint ID to the displayed avatar

After placing an avatar on Vket Booth Maker, a "VketAvatarPedestal" button will appear.
Clicking this button will open a window to enter an avatar Blueprint ID. Paste the copied ID from Step 2, and press "Complete" to set the Blueprint ID.
🔸Uploading Videos
By placing an item with the video upload feature, a video can be exhibited in the Vket booth!
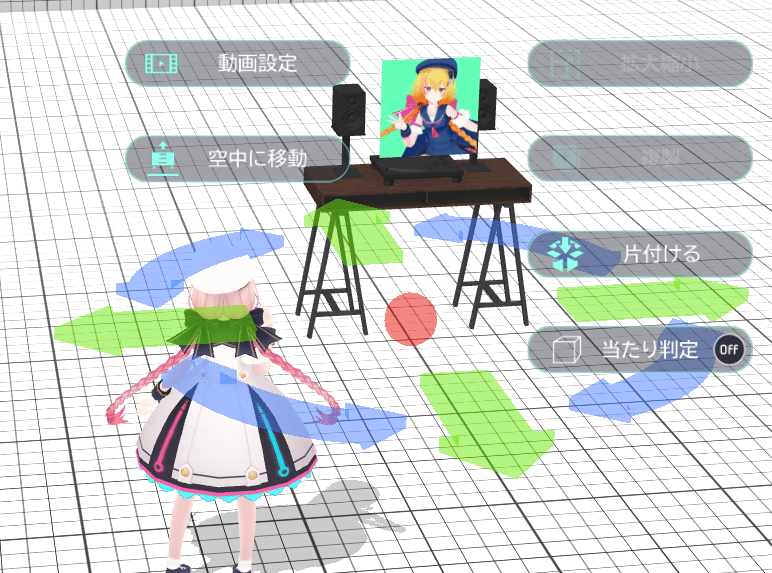
To begin a video setup, place an item with the Video Upload feature included.
Click on the "Video Settings" button to open a window to designate a thumbnail and video data.
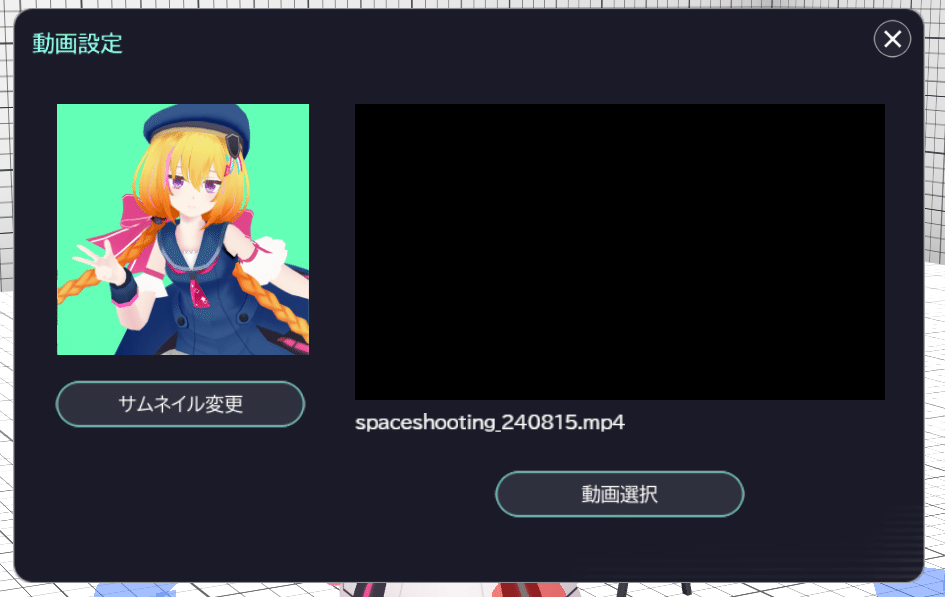
Format for Video Upload
Thumbnail Image Ratio: 1:1 square
Video Size: 16:9 (Landscape)
*1280 × 720 px recommended
Video Data Size: 30MB or under
File Format: mp4
Video/Thumbnail can be uploaded in formats other than above, which will be reformatted automatically with black spaces.
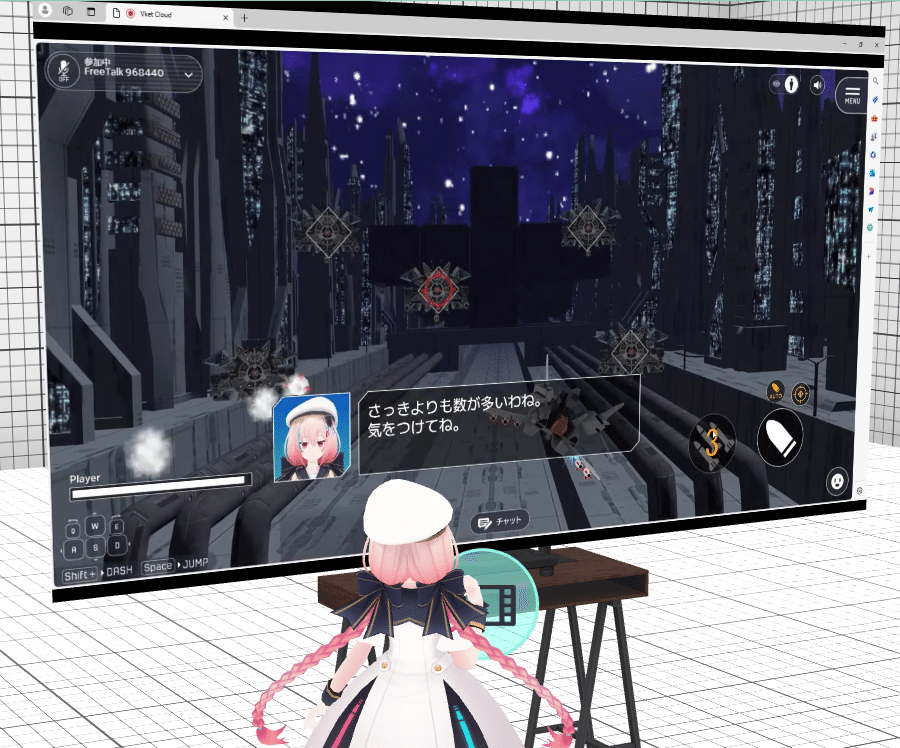
Saving the video setup will result in an appearance as below:
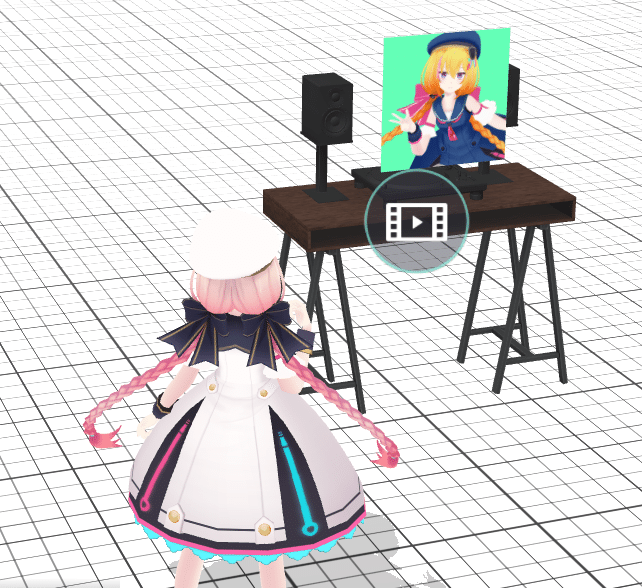
On the Vket Booth Maker, the video will play when the thumbnail is clicked.
On VRChat, the video will play when the visitor comes close!
Virtual Market Official Website

Vket Booth Maker & Marche Official Website

Check our X (Twitter) for latest news and updates!
Other Interesting Articles
