

【Vket Booth Maker】 How to convert your avatar file in 10 steps: FBX to VRM format

🔸New Feature for Vket Booth Maker: VketAvatarPedestals!
A new update for Vket Booth Maker has been added for Vket2024 Winter: VRM avatars on Vket Booth Maker can now be linked with sample avatar pedestals for VRChat exhibitions!
Learn more on our exclusive article👇
However, to exhibit your avatar using Vket Booth Maker, the avatar data must be converted to VRM format for My Vket support.
Learn how to convert your FBX files to VRM format for Vket Booth Maker in 10 steps, by using Unity and UniVRM!
File Format Regulation
Before converting your avatar files, My Vket has the following regulations for uploading VRM files!
Consider the following before/during conversion, and check your file if uploading stops with troubles:
Avatar (VRM format): Needs to be VRM0.X, VRM 1.0 files cannot be used
File size must be 30MB or less
Total polygon count must be 50,000 or less
Texture files must be png format. jpg is not allowed!
For details, please see the help page below:

1. Import UniVRM to Unity
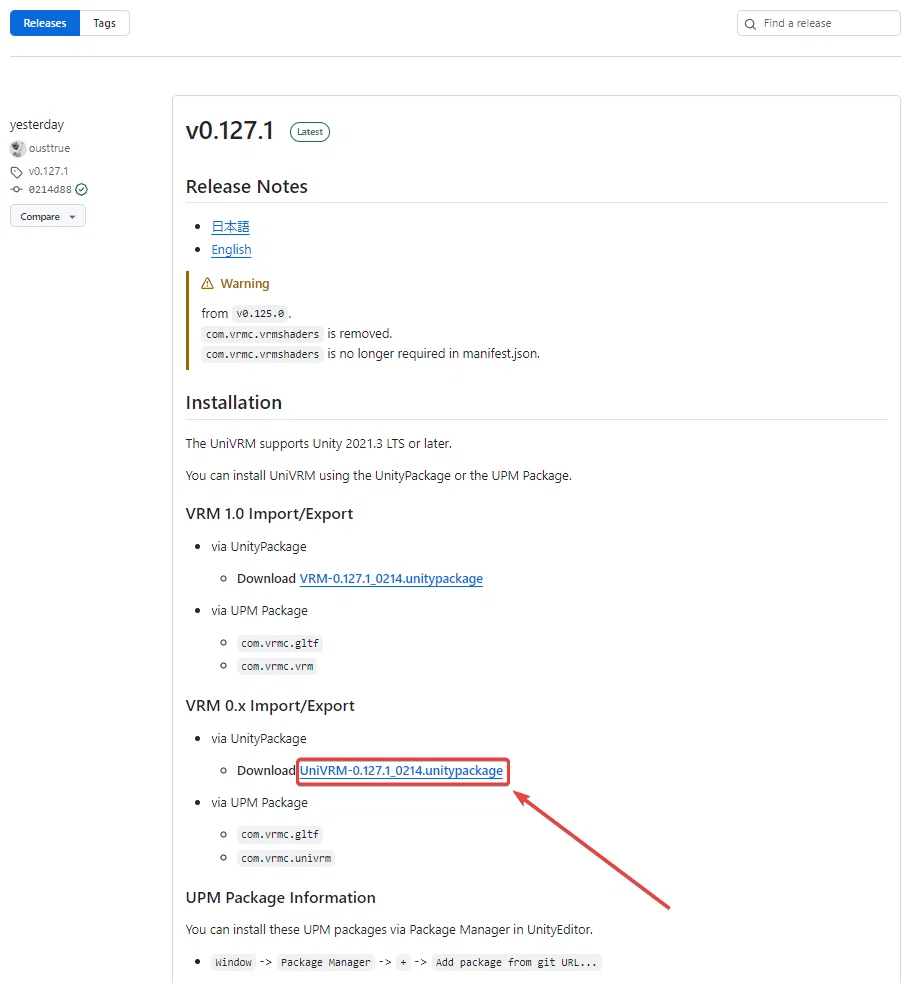
First, download UniVRM from the page below:
https://github.com/vrm-c/UniVRM/releases
*While there are two editions: "vrm-1.0" and "vrm-0.x," please make sure to use "vrm-0.x"!
2. Open a Unity Project
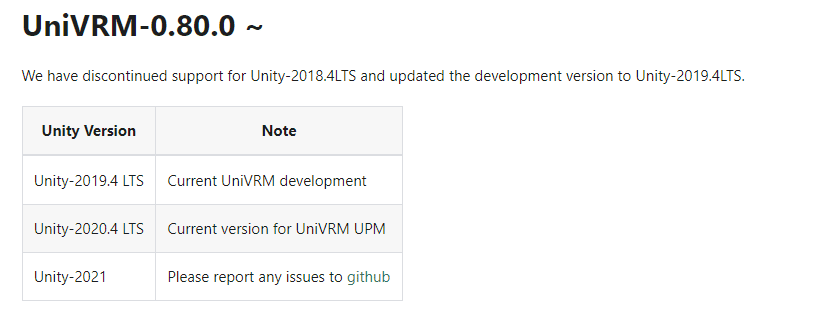
Before opening/setting up a Unity project, make sure if the editor version is correct. On UniVRM-0.80.0 and later releases, Unity 2019.4.LTS and later editors are available for use.
https://vrm.dev/en/univrm/install/unity_version/
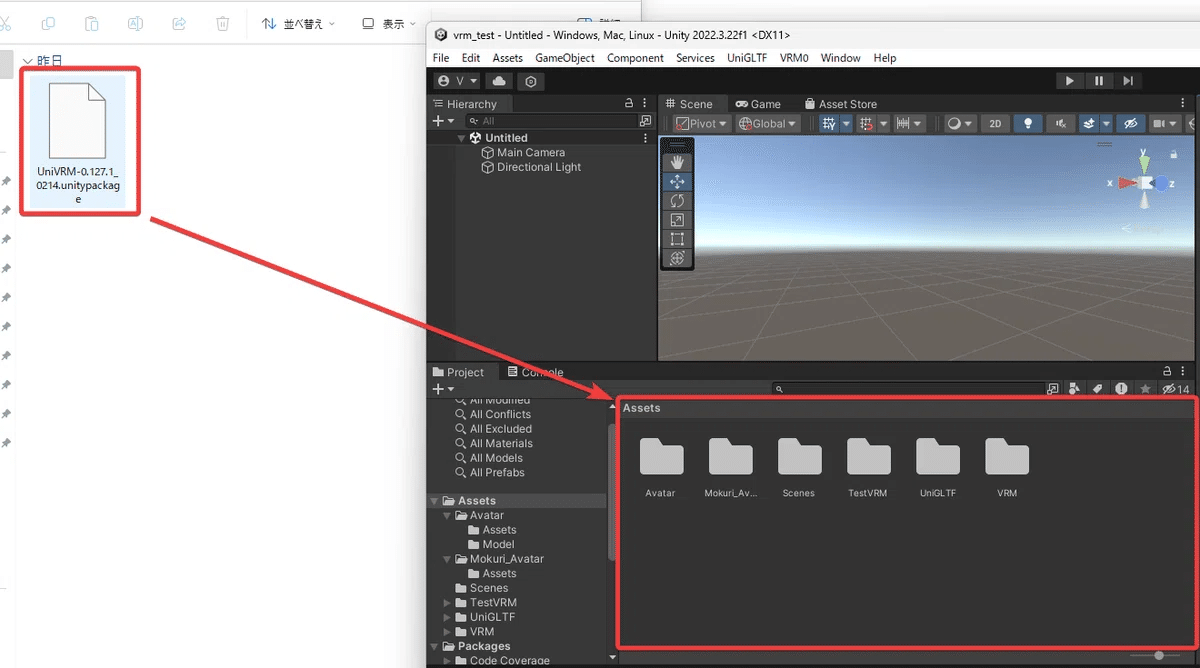
3. Import UniVRM to Unity Project
Drag and drop the downloaded UniVRM-<Version No.>.unitypackage to "Project" in the Unity editor.
4. Import Avatar Data (FBX, textures, etc.)
Import your own files for the avatar to be converted!
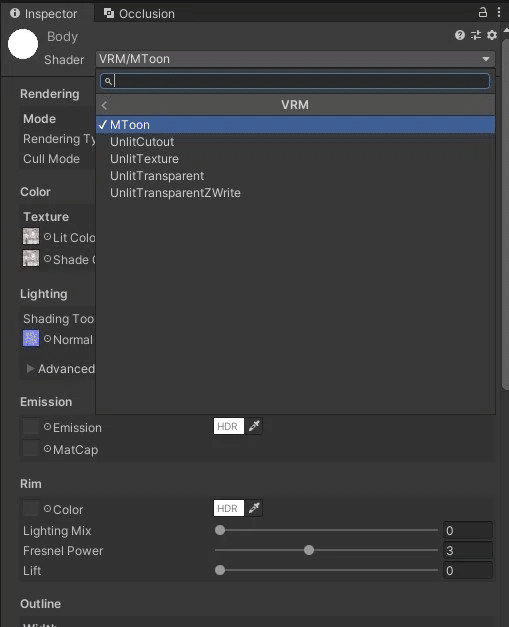
Designate the material for the FBX model data:
*VRM only supports 3 shaders: unlit, standard, and MToon.
If your avatar uses other shaders, consider changing to either of the above.
5. Convert Animation Type to Humanoid
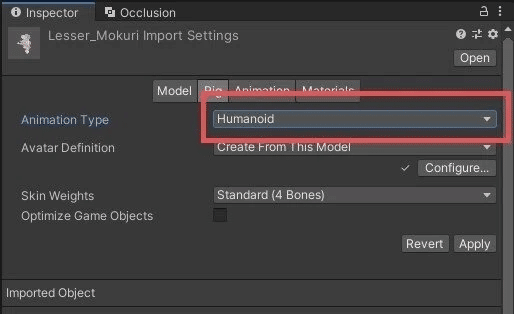
Make sure the model's animation type is Humanoid!
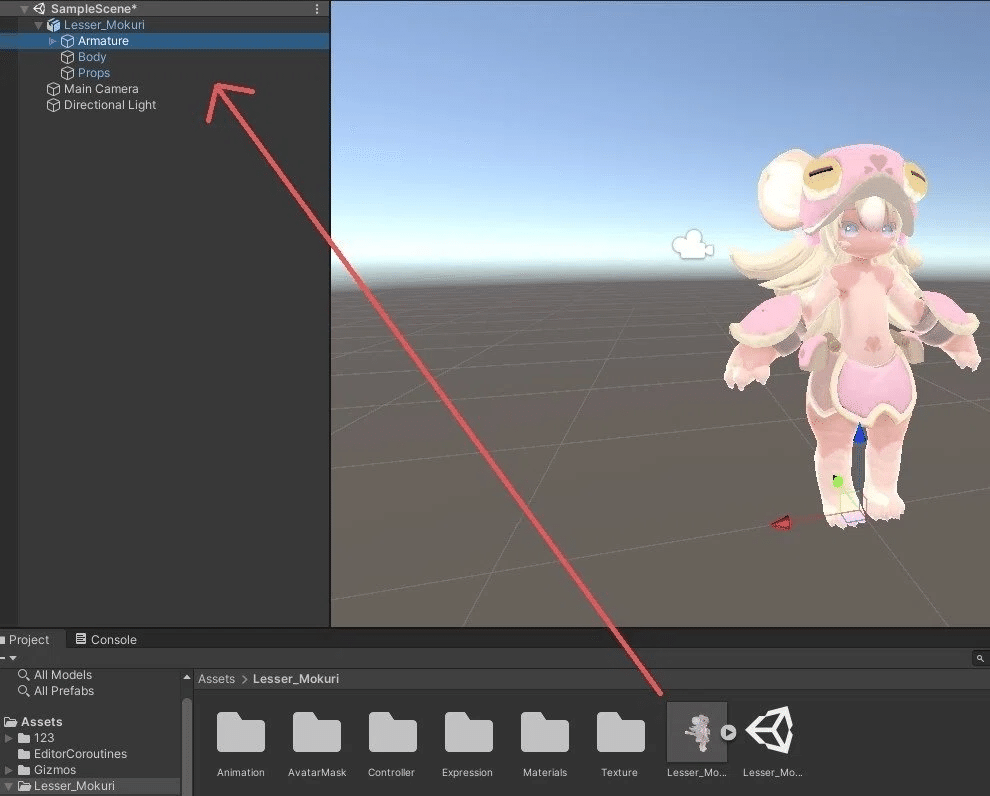
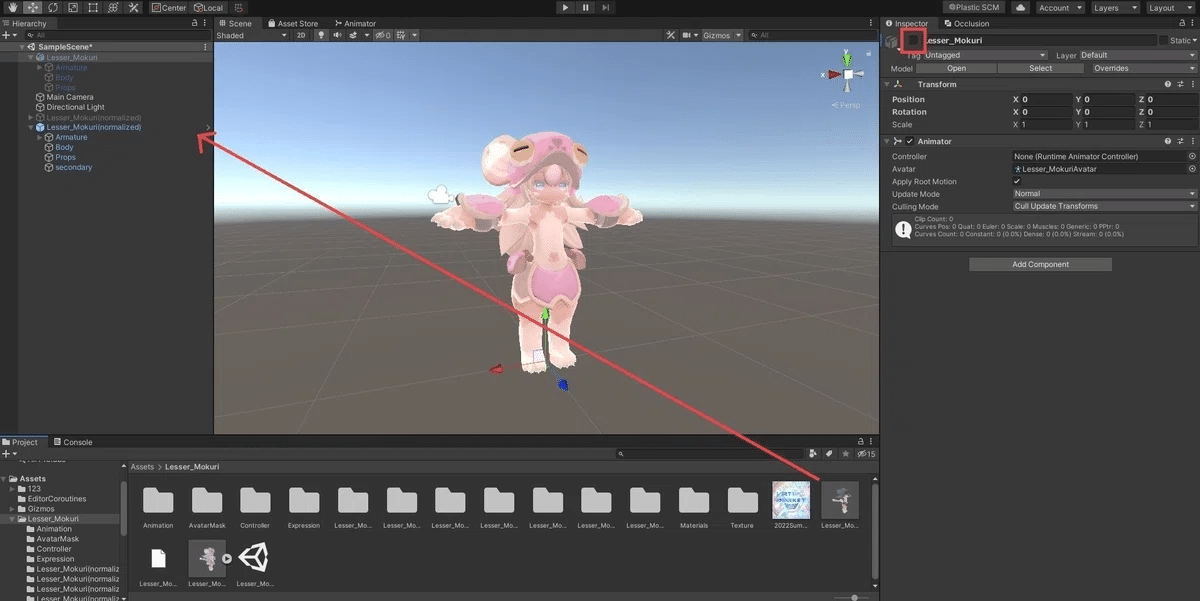
6. Rough Conversion
To reduce unexpected issues, we recommend to do a "rough conversion" / normalization to vrm and adjust parameters.
Drop the model on the scene:
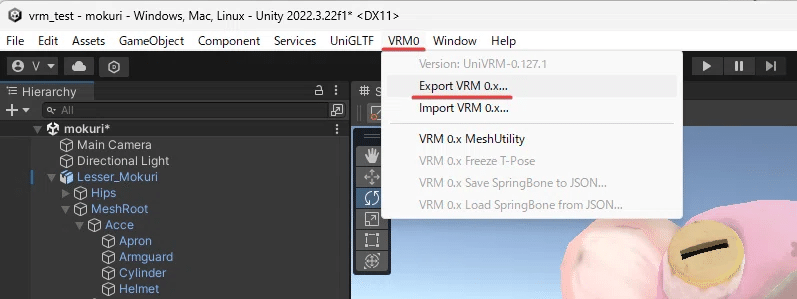
Select VRM0 --> Export VRM 0.x… to start the conversion.
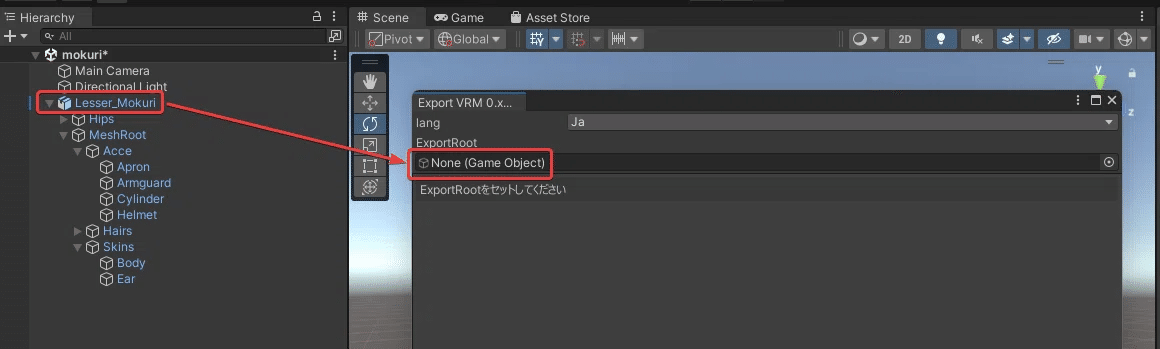
As the VRM Exporter will open, drop the model to the [ExportRoot] from the Hierarchy.
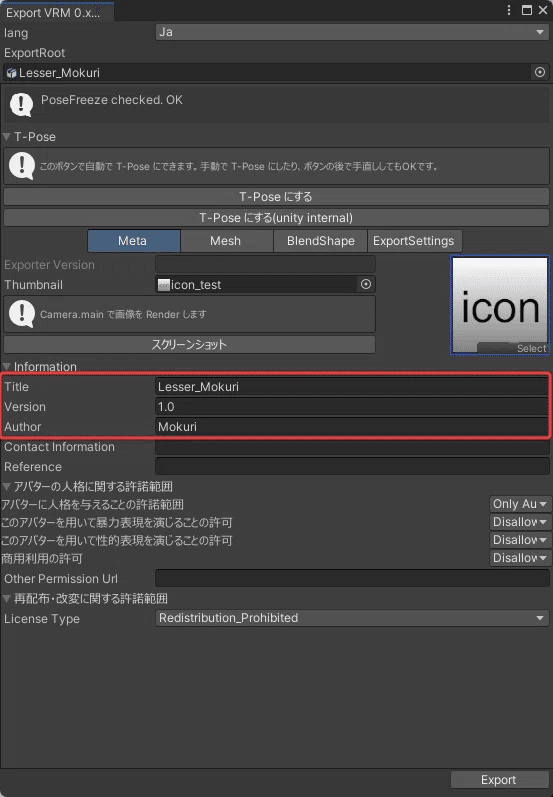
7. Set Model Information
Title, Version, and Author information is required to create a VRM file. Entering this will allow the model to be converted by pressing "Export"! You may add other configurations and a thumbnail image as option.
8. VRM Export
Export the VRM file! Select a location at your choice to save the exported VRM file.
*If any error occurs, VRM file export may fail. Please check the error and see the official documentation to solve the occurring issue.
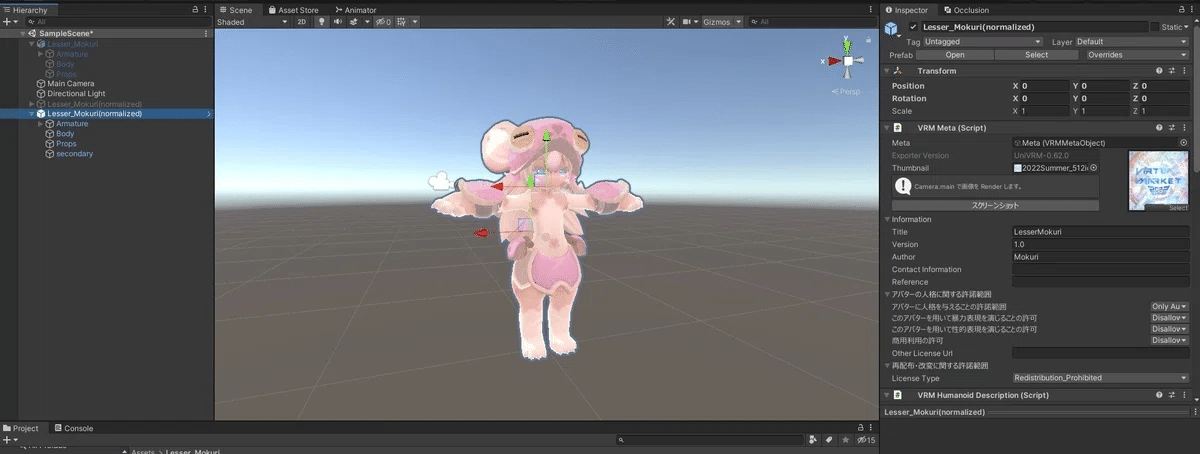
9. Readjust Model
After a rough conversion, readjust the model to make a final version for use!
Re-import the exported VRM file to Unity
If you've saved the exported VRM file under the Asset folder, this step can be passed!
Place the imported VRM file on the scene
Importing the VRM file will create a Prefab, which can be used to drag & drop to the Hierarchy. The previous FBX model and other objects will not be used, so feel free to inactivate them!
Select the VRM Model to edit on the Inspector (Title, Author, License Information, etc.)
*Facial expressions and physics can also be adjusted on this step. Please see the official documentations for details:
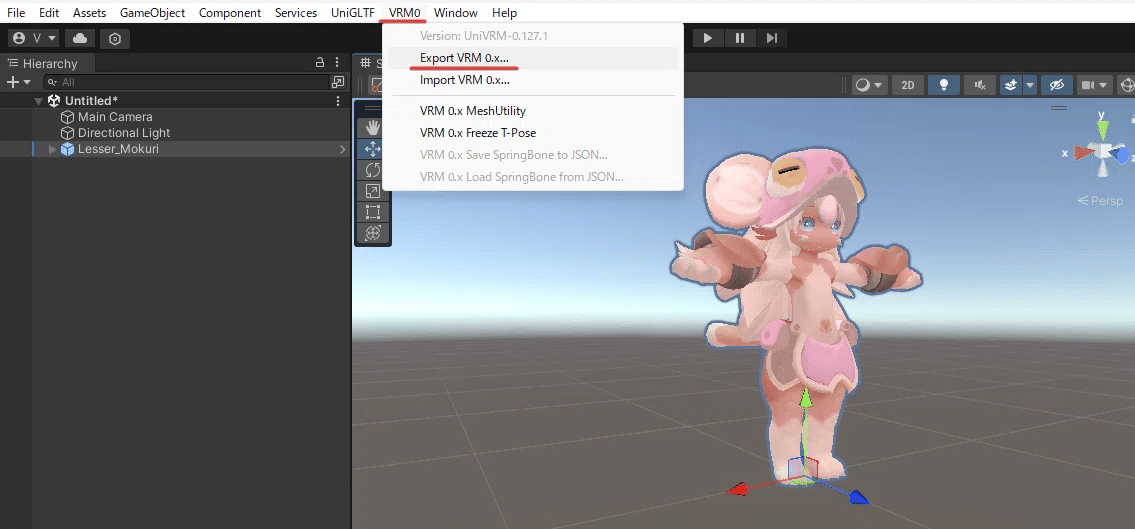
10. Finalize VRM Export
After adjusting, select the VRM model and open VRM0 --> Export UniVRM-0.x to create a finalized version:
Save the re-exported VRM file at a location of your choice!
Done!
Woo-hoo! Now your avatar file is ready to be used on My Vket, which can be uploaded / placed on Vket Booth Maker as an avatar display with a Blueprint ID from VRChat!
For instructions on how to setup an avatar display, see our other article👇
