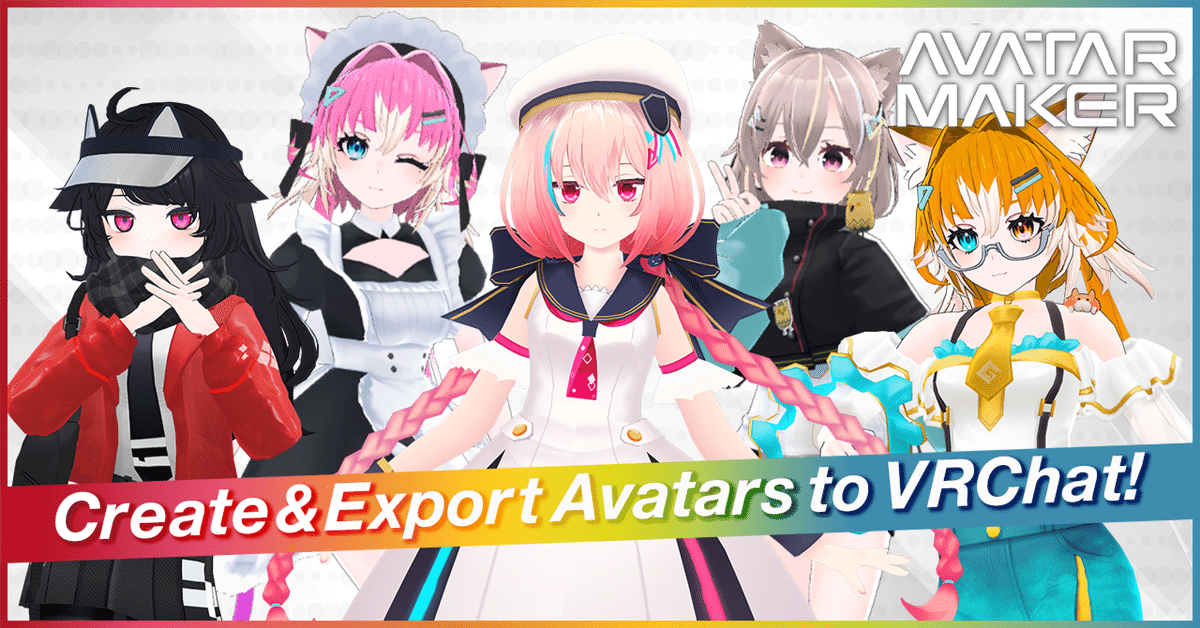
How to create & export your avatar data to VRChat using the Avatar Maker
With the Avatar Maker, creating your original avatar in your browser has never been easier! The service continues to evolve with updates, including new hairstyle options and collaborations with popular avatars, making it more user-friendly than ever.
In this article, we'll guide you through the process of using Avatar Maker to create an avatar and import it into VRChat!
For latest updates, follow our official Avatar Maker account on X (Twitter)
*For English information, also check EnVket!
Contents
🔶What is VRM?
VRM is a standard format for 3D avatars. It can be used in various virtual spaces, games, and compatible applications.
In this article, we’ll explain how to export your created avatar from Avatar Maker as a VRM file and upload it to VRChat.
🔷Learn how to use basic features in Avatar Maker:
🔶Downloading VRM Data from Avatar Maker
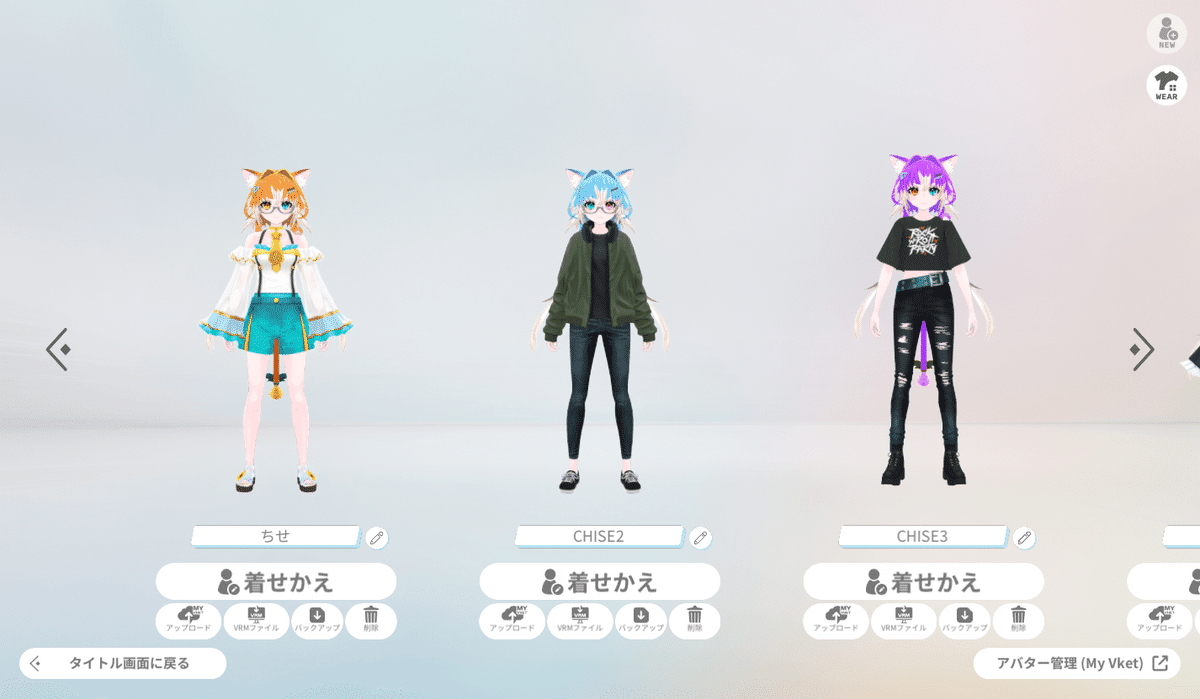
Navigate to the avatar selection screen in Avatar Maker and click the VRM button (marked with a red circle in the example below).
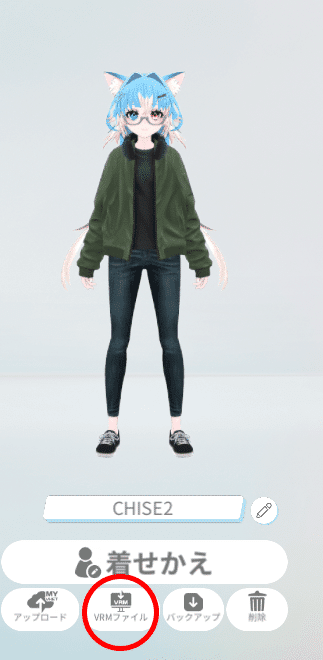
Once clicked, the VRM file for your created avatar will be downloaded.
🔹Preparation for Uploading Avatars to VRChat
To upload an avatar to VRChat, certain conditions must be met:
Your player trust rank must be at least "New User"
Install the Unity editor version supported by VRChat SDK
Install the VRChat Creator Companion (VCC)
For detailed instructions, refer to the article below:
🔹Importing and Uploading Your Avatar
Open your project following the instructions from the guide linked above.
As VRM files are not directly compatible with VRChat, it cannot be uploaded as usual avatars without an external tool. For this example, the VRM Converter for VRChat is used.
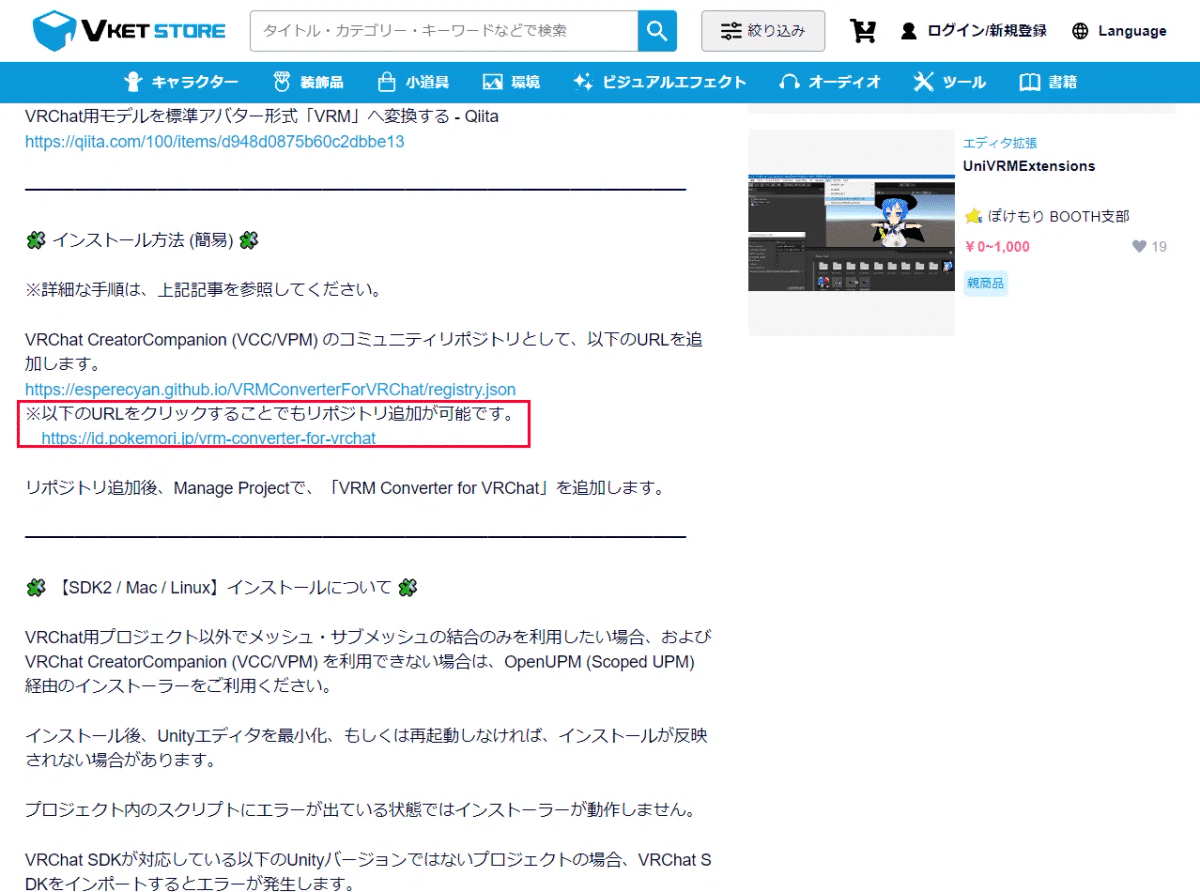
Click the "Add Repository" button in the description section of the product. This will open the VCC with a screen like the one shown below.
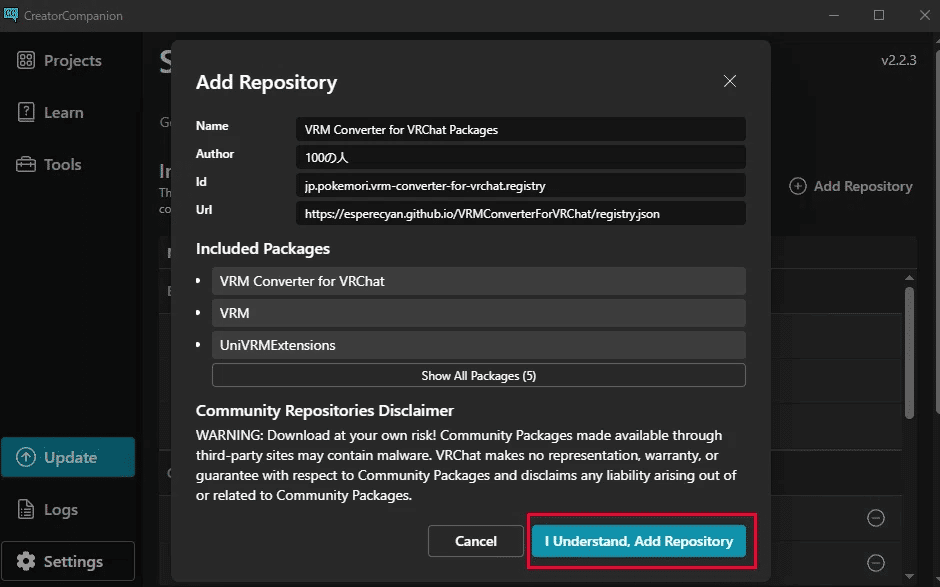
Adding a repository as this will allow the tool to be automatically updated and installed directly in VCC, saving time compared to downloading from the website.
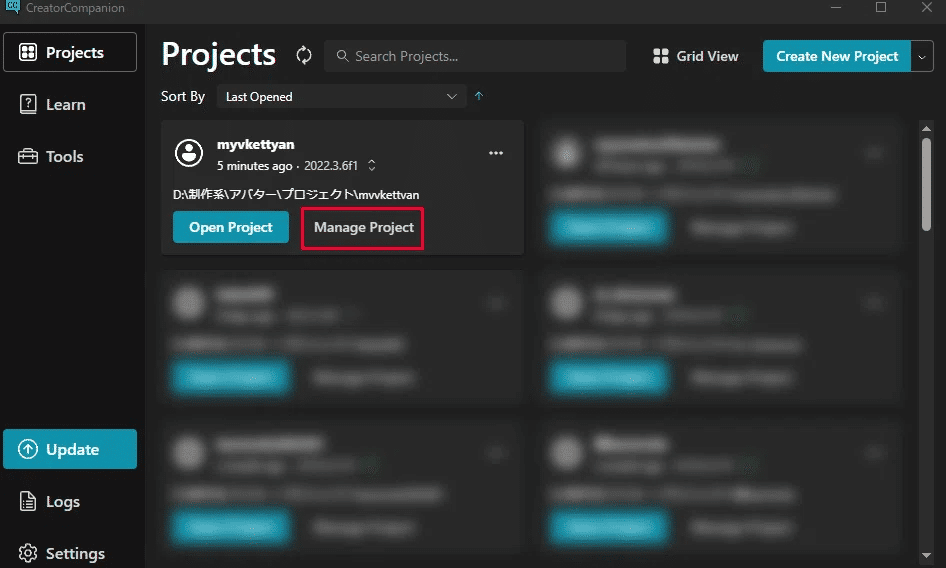
After setting up the repository, navigate to the Projects tab in VCC, select Manage Project, and check the installed version of the VRM Converter for VRChat.
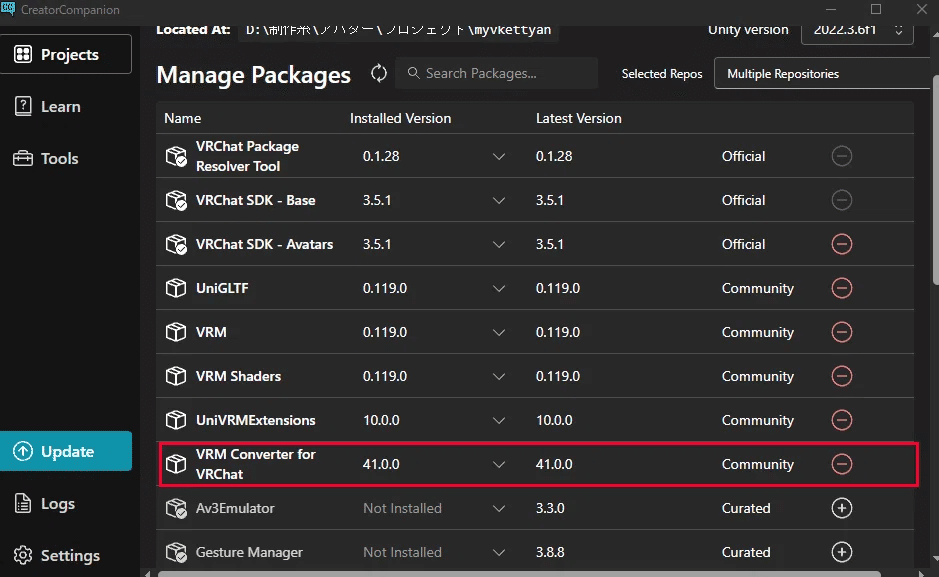
If the Installed Version for the VRM Converter for VRChat is appearing, setup is complete!
🔶Adjusting VRM for VRChat
Drag and drop your downloaded VRM file into the Assets folder in Unity. This will generate a Prefab (highlighted in red below).
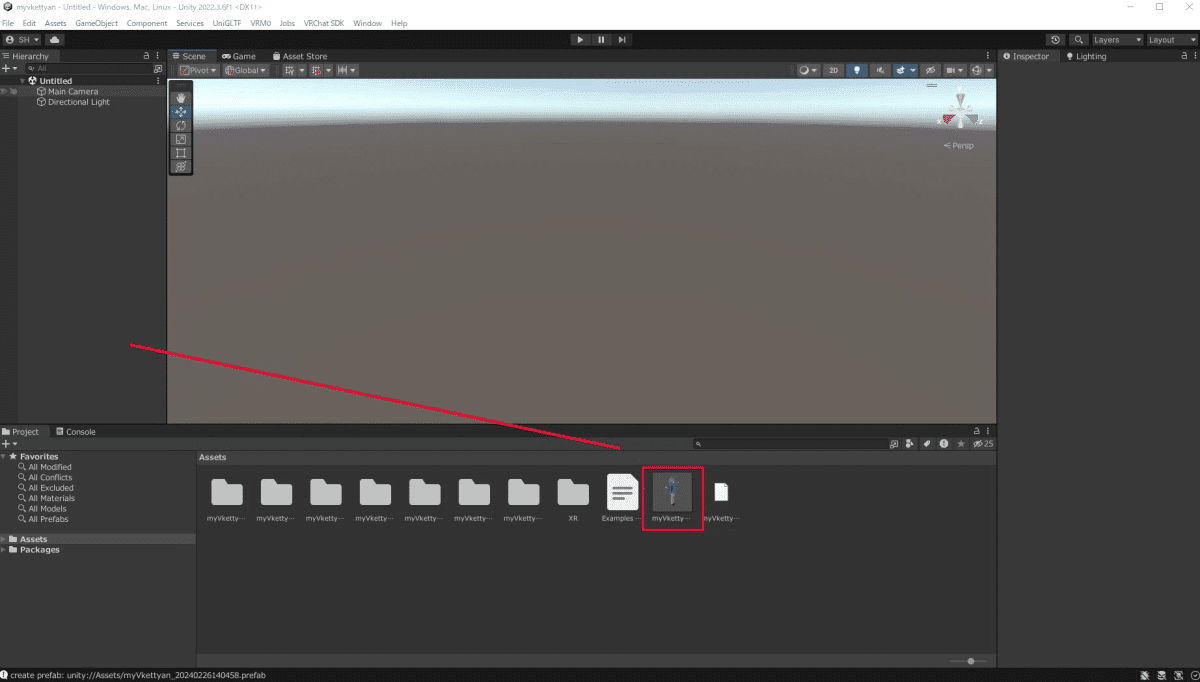
Drag the Prefab into the Hierarchy window to display your avatar.
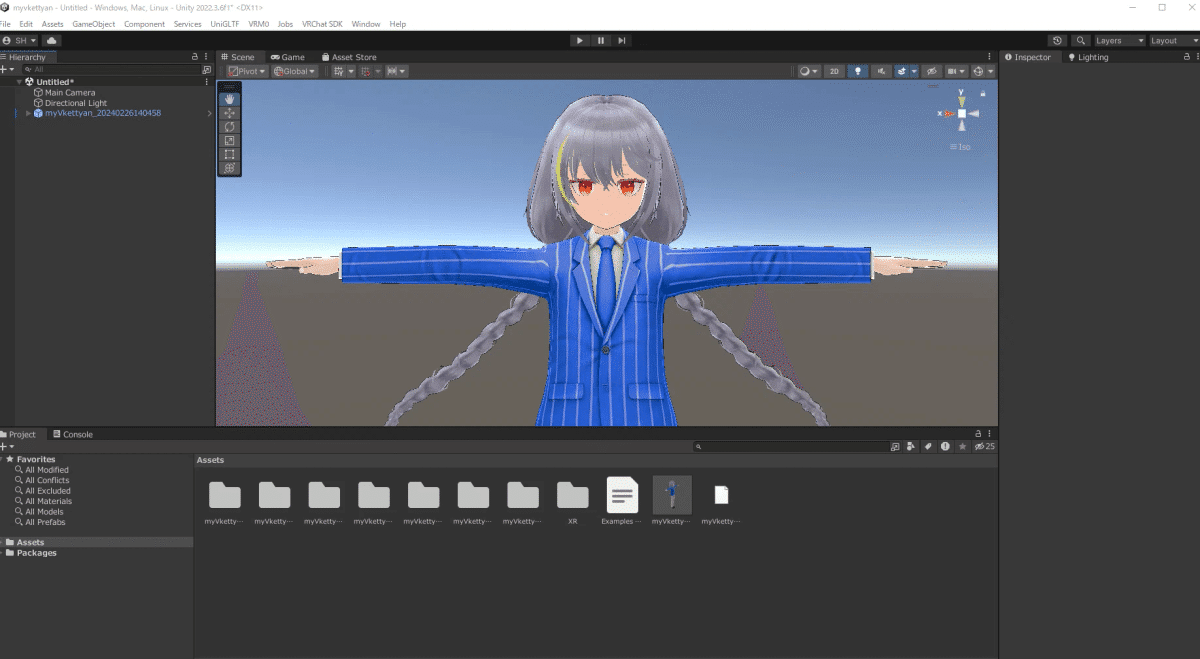
Before uploading to VRChat, this VRM file needs to be converted for compatibility.
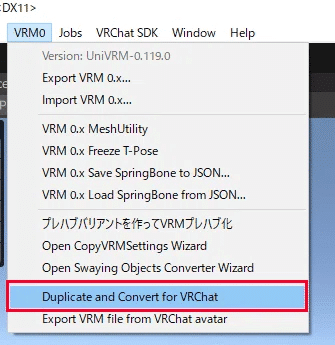
Select the Prefab in the Hierarchy and go to the VRM0 > Duplicate and Convert for VRChat option in the menu.
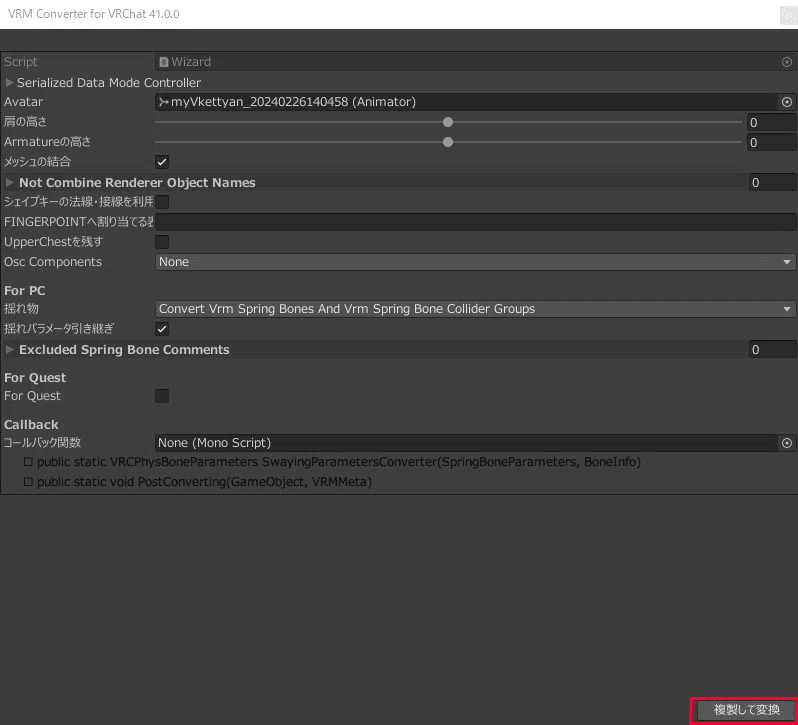
A settings window will appear. If you don’t need specific adjustments, simply click Convert and Duplicate at the bottom.
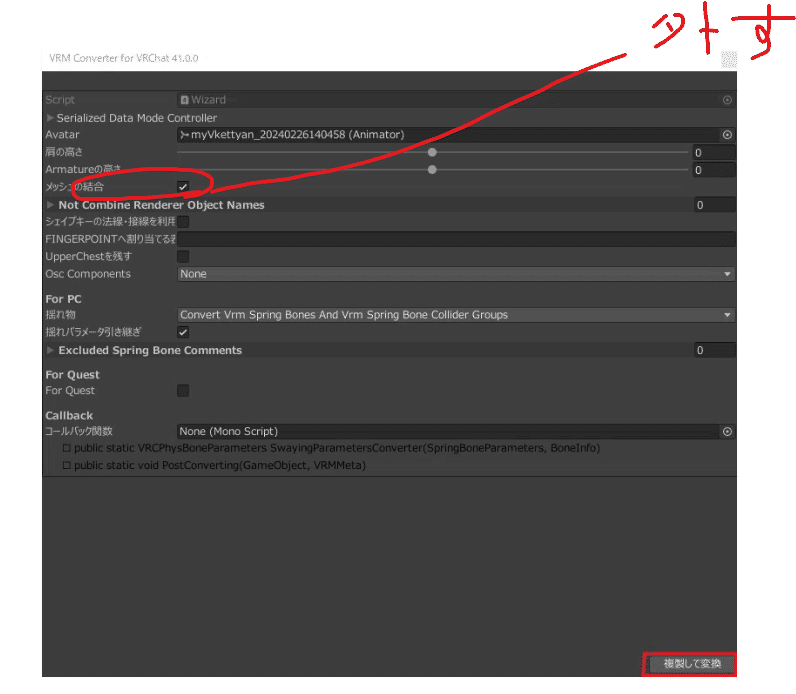
Tip: If the conversion fails, try turning off mesh combining (as shown below).
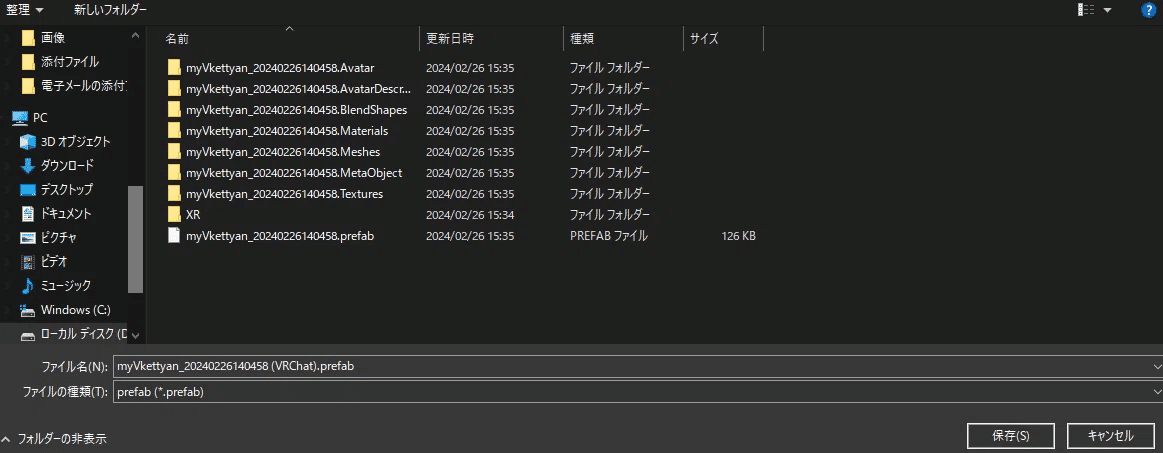
Once conversion is complete, the Prefab converted for VRChat will appear in the Hierarchy.
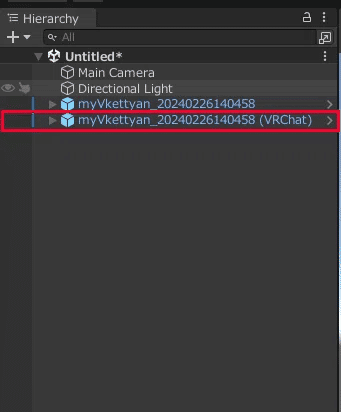
Select the converted Prefab (named "XXX (VRChat)") for upload. Open the VRChat SDK menu in Unity and select Show Control Panel.
Log in with your VRChat account, name your avatar, and start the upload process by clicking Build & Publish for Windows.
When "Upload Succeeded!" appears, the upload is complete!
And that's all for upload instructions for VRM files from Avatar Maker… have fun creating your own avatars!
For latest updates, follow our official Avatar Maker account on X (Twitter)
*For English information, also check EnVket!
Recommended Articles


